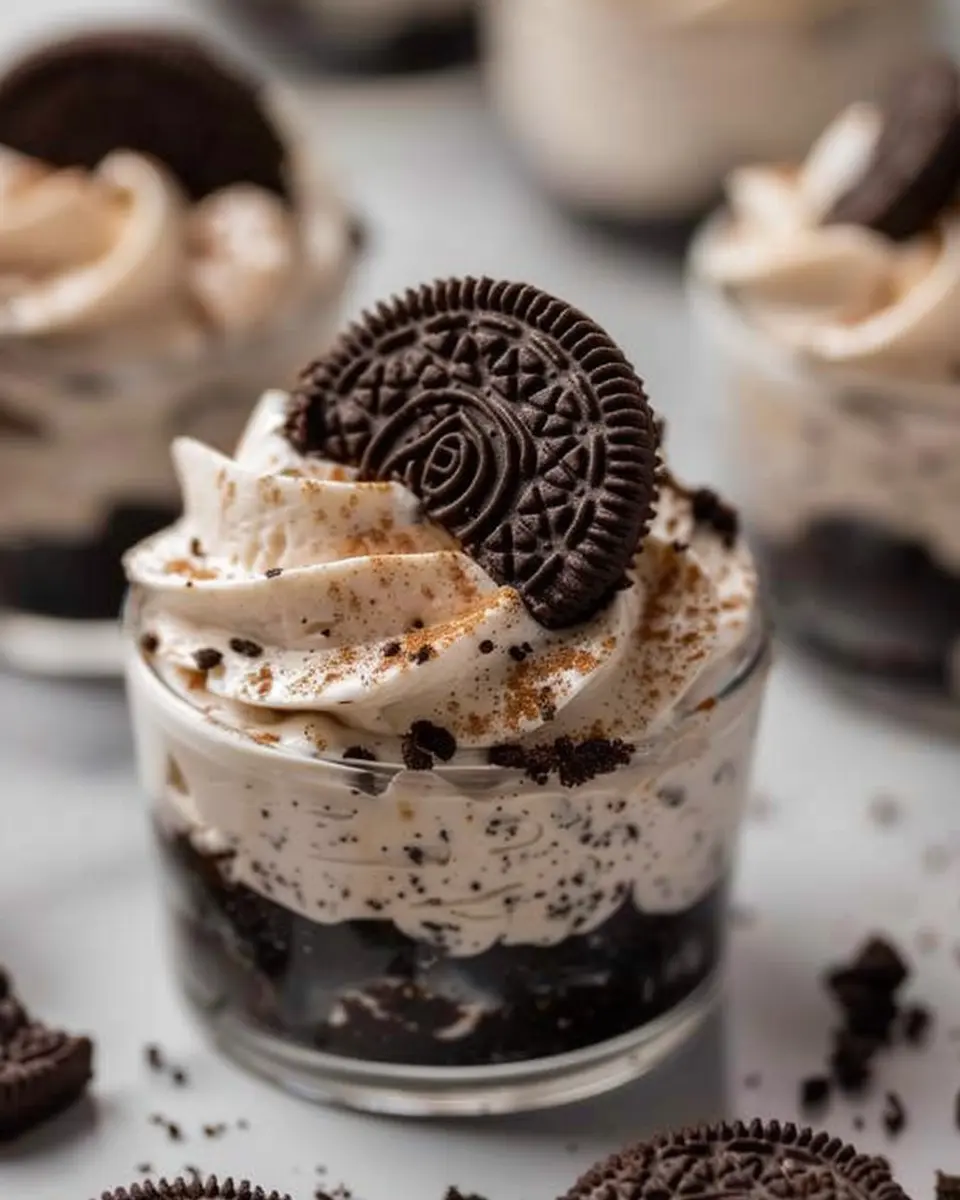
Introduction to No-Bake Oreo Cheesecake Cups
The allure of no-bake desserts
If you’re a young professional navigating a busy schedule, you’ve likely experienced the temptations of decadent desserts but were deterred by the prospect of firing up the oven. Enter the realm of no-bake desserts, where ease meets indulgence! Imagine a sweet treat that requires minimal effort, no baking, and can be enjoyed in just a few simple steps. Experts agree that no-bake desserts are not only time-savers but also perfect for those who love to entertain without the fuss. With vibrant flavors and creative twists, this category of sweets brings the joy of dessert right to your kitchen without the extra layer of heat.
Why Oreo cheesecake cups are perfect for young professionals
As a busy young professional, you probably crave treats that don’t just taste great, but also fit seamlessly into your lifestyle. That’s where no-bake Oreo cheesecake cups come into play. These delightful cups are the epitome of simplicity and satisfaction. No baking means no worry about timing your bake, and the individual servings are a dream when it comes to portion control—always a win!
Here’s what makes these Oreo cheesecake cups a must-try:
- Minimal Time Investment: You can whip these up in under 30 minutes, giving you more time to focus on that Netflix binge or catching up with friends.
- No Fancy Equipment Needed: A mixing bowl, a whisk, and some cups are all you need. It doesn’t get easier than that!
- Customizable Delight: Whether you want to switch up the cookie layer or add toppings like fruit or chocolate drizzle, these cups are super versatile.
Moreover, did you know that the combination of cream cheese and dessert cookies can elevate your mood? A study published by the National Institutes of Health suggests that indulging in flavorful treats like Oreo cheesecake might just help reduce stress levels. So, not only are you treating your taste buds, but you’re also doing wonders for your well-being!
Ready to jump into the creamy, dreamy world of no-bake Oreo cheesecake cups? Let’s dive into the ingredients and steps that make this dessert an instant favorite!
Ingredients for No-Bake Oreo Cheesecake Cups
Essential ingredients overview
Creating no-bake Oreo cheesecake cups is both simple and satisfying! To whip up this delectable treat, you’ll need:
- Oreo cookies: The star of the show that provides flavor and a crunchy texture.
- Cream cheese: A must for that creamy, rich filling.
- Sour cream: It adds a wonderful tanginess, balancing the sweetness.
- Granulated sugar: To enhance the sweetness of our cheesecake.
- Heavy cream: Whipped to perfection, it helps achieve a light and airy texture.
- Butter: This binds the crust together and adds richness.
Ingredient notes and alternatives
If you’re looking to tweak your no-bake Oreo cheesecake cups, consider these notes:
- Cream cheese can be swapped with Greek yogurt for a lighter version.
- If you’re avoiding sugar, a sugar substitute works well.
- For a gluten-free option, use gluten-free Oreo cookies.
Feeling adventurous? Try adding a splash of vanilla extract for an extra layer of flavor. To dive deeper into ingredient options, check out this guide on ingredient substitutions!
No matter how you personalize it, these cups are sure to impress and satisfy.
Preparing No-Bake Oreo Cheesecake Cups
Creating delightful no-bake Oreo cheesecake cups is easier than you might think! These little bites of heaven are perfect for a quick dessert, a picnic treat, or a sophisticated addition to your next gathering. Here’s how to whip them up in no time.
Gather and Prep the Ingredients
Before diving into the fun part, let’s gather our ingredients. You’ll need:
- 24 Oreo cookies
- 8 oz cream cheese, softened
- 1 cup whipped topping (thawed)
- 1/4 cup granulated sugar
- 1 tsp vanilla extract
- Extra Oreos for garnish (optional)
Having everything ready ensures a smooth process. You can find these ingredients at your local grocery store, and if you’re looking for alternatives, many health food stores offer low-fat or dairy-free options!
Crush the Oreos
Crushing Oreos is probably the most fun step. Trust me, it’s cathartic! You can use a food processor for a fine crumb, or place them in a resealable bag and crush them with a rolling pin if you want to relieve some stress.
- Tip: Aim for a mix of finely crushed Oreos and some chunkier pieces for texture. It adds that “wow” factor to your no-bake Oreo cheesecake cups.
Mix Cream Cheese and Whipped Topping
In a large mixing bowl, combine the softened cream cheese and granulated sugar. Use an electric mixer on medium speed until it’s smooth and creamy. Then, gently fold in the whipped topping until there are no lumps. It’s key to achieve that light and airy texture that makes cheesecakes so delightful!
- Did you know? Cream cheese adds a richness that pairs perfectly with the cookie crunch, creating an irresistibly delicious flavor blend.
Incorporate the Crushed Oreos
Now, let’s add those crushed Oreos to the cheesecake mixture! Stir them in gently, being careful not to deflate the mixture. This step is where the cookies really make their mark. Picture the creamy blend studded with bits of cookie – so delicious!
- Consider saving some of the crushed Oreos for garnish later. They’ll make your no-bake Oreo cheesecake cups look even more tempting!
Assemble the Cheesecake Cups
Grab your serving cups or small jars and start layering! Spoon a layer of the creamy mixture followed by a layer of crushed Oreos at the bottom. Repeat this until you reach the top of each cup. This layering creates a beautiful visual effect and ensures every bite has both cream and cookie.
- For added flair, get creative with presentation! Use mason jars or cute dessert cups you can find at places like Target or Amazon.
Chill Before Serving
The last step, and arguably the hardest part, is waiting! Place your assembled no-bake Oreo cheesecake cups in the refrigerator for at least 2-3 hours, or overnight if you can wait. This chilling time allows the flavors to meld and the cheesecake to set, resulting in a velvety texture that’s oh-so-satisfying.
- Pro tip: If you’re in a pinch, even a quick 30-minute chill can make a difference, but trust me, patience is key here.
When you’re ready to serve, feel free to top with extra whipped topping or a sprinkle of crushed Oreos. These little cups are sure to impress your friends and family, and who knows, they might become your go-to dessert recipe!
There you have it! Easy, delicious, and oh-so-indulgent no-bake Oreo cheesecake cups that are sure to leave everyone wanting more. Happy baking, or rather, no-baking!
Variations on No-Bake Oreo Cheesecake Cups
If you’re as obsessed with no-bake Oreo cheesecake cups as I am, you’ll love experimenting with different flavors to keep things interesting! Let’s dive into some of my favorite variations that will surely impress your friends at your next gathering.
Mint Oreo Cheesecake Cups
Are you a fan of that fresh minty burst? Then Mint Oreo cheesecake cups are calling your name! Just swap out classic Oreos for Mint Oreos to create a delightful balance of chocolate and mint. To elevate the flavor, add a drop of mint extract to your cream cheese mixture. Top your cups with a dollop of whipped cream and a sprig of fresh mint for that extra touch. Mint in desserts has been shown to stimulate your taste buds, making it a hit at parties!
Peanut Butter Oreo Cheesecake Cups
If you’re a peanut butter lover (and who isn’t?), these Peanut Butter Oreo cheesecake cups will be your go-to! Combine crushed Oreos with creamy peanut butter in the base and add a swirl of peanut butter to the cheesecake filling for a rich texture. Finally, sprinkle crushed peanuts on top for a satisfying crunch. Peanut butter has been linked to increased satiety, which means you might be satisfied with just one… or maybe two!
Gluten-Free Options
Don’t think you’ll miss out just because you’re gluten-sensitive. Simply replace regular Oreos with gluten-free Oreos, and you won’t even notice a difference! For the cheesecake filling, ensure you’re using gluten-free cream cheese and other ingredients. Your no-bake Oreo cheesecake cups can be deliciously enjoyed by everyone. You can explore gluten-free baking tips over at sites like Celiac Disease Foundation for more inspiration.
Now that you’ve got these variations in your back pocket, indulge your creativity! What flavor will you try first?
Cooking Tips and Notes for No-Bake Oreo Cheesecake Cups
Tips for Achieving the Perfect Texture
To ensure your no-bake Oreo cheesecake cups have that dreamy, creamy texture, start with room temperature cream cheese. This makes it easier to blend smoothly with sugar and whipped cream. For an ultra-fluffy finish, consider using heavy whipping cream instead of regular cream—more volume equals a lighter treat! Also, don’t skip the chilling time; letting your cheesecake cups chill for at least four hours helps the flavors meld and the texture to set perfectly.
Storage Tips for Longer Freshness
If you find yourself with leftover no-bake Oreo cheesecake cups, fear not! They can be stored in an airtight container in the fridge for up to five days. Just make sure to keep them chilled and avoid exposing them to heat or direct sunlight, as this can affect their consistency. For longer storage, consider freezing them, though the texture might change slightly upon thawing. For best results, skip the toppings until right before serving. Interested in more tips on food storage? Check out USDA guidelines on proper food storage here.
Happy cooking! Enjoy your delicious no-bake Oreo cheesecake cups!

Serving Suggestions for No-Bake Oreo Cheesecake Cups
Ways to Present Your Cheesecake Cups
When it comes to serving your no-bake Oreo cheesecake cups, presentation is key! Try using clear plastic or glass cups to showcase the delicious layers of crushed Oreos and creamy cheesecake filling. If you’re feeling extra fancy, top each cup with a dollop of whipped cream and a mini Oreo for that Pinterest-worthy finish. For a fun twist, consider using mason jars to give your dessert a rustic vibe.
Pairing Ideas for a Complete Dessert Experience
To elevate your dessert game further, think about pairing your no-bake Oreo cheesecake cups with complementary flavors. A scoop of vanilla bean or chocolate ice cream can add a delightful contrast. For some added crunch, serve alongside honey-roasted nuts or fruit skewers featuring fresh strawberries or bananas.
Looking for more insights on dessert pairings? Check out this comprehensive guide on dessert flavors that can enhance your dining experience!
Time Breakdown for No-Bake Oreo Cheesecake Cups
Preparation Time
Creating your delightful no-bake Oreo cheesecake cups is a breeze! You’ll need about 15-20 minutes to prep your ingredients and put everything together. This quick prep time means you can whip these up even on busy weekdays or after work.
Chilling Time
After you’ve prepped your cups, the magic happens while they chill. Allow them to sit in the refrigerator for at least 2-3 hours. This step is crucial as it helps the flavors meld and the cheesecake firm up.
Total Time Required
In total, you’re looking at about 2.5-3 hours from start to finish, most of which is hands-off chill time. So, you can spend that time catching up on your favorite show or scrolling through social media. If only all desserts were this easy!
For additional tips on accelerating chilling time, consider checking out Food Network’s guide on chilling techniques. Happy baking!
Nutritional Facts for No-Bake Oreo Cheesecake Cups
When indulging in no-bake Oreo cheesecake cups, you might wonder about their nutritional content. Here’s a quick peek.
Calories per serving
Each delightful cup comes in at around 250 calories, making it a sweet yet portion-controlled treat. Perfect for those late-night cravings or sweetening up your gatherings without going overboard.
Key macronutrients
In every cup, you’ll find:
- Fat: Approximately 15g, primarily from the cream cheese and whipped cream, adding that creamy richness.
- Carbohydrates: A sweet 30g, mostly from the Oreos, perfect for those sugar cravings.
- Protein: Roughly 3g, providing some balance to this dessert.
For a deeper dive into ingredients and dietary choices, check out resources from the USDA or Nutrition.gov for comprehensive nutritional guidelines. Enjoy your sweet treat with a sprinkle of knowledge!
FAQs about No-Bake Oreo Cheesecake Cups
Can I substitute the cream cheese?
Absolutely! If you’re looking for a lighter option, you can use mascarpone cheese or a vegan cream cheese alternative. These substitutions will still give you that delightful creamy texture essential for your no-bake Oreo cheesecake cups. Just keep in mind that altering the base might change the flavor slightly, so choose one that fits your taste.
How long can I store these cheesecake cups?
You’ll be pleased to know that no-bake Oreo cheesecake cups can be stored in the refrigerator for up to a week! Just make sure to keep them covered with plastic wrap or in airtight containers to maintain their freshness. If you’re prepping for a party or a gathering, you can make them a day ahead for an even more stress-free hosting experience!
What’s the best way to crush Oreos?
Crushing Oreos can be both fun and therapeutic! Here are a few methods you can choose from:
- Food Processor: Simply pulse the Oreos until they reach a fine crumb. This method is quick and efficient.
- Zip-Top Bag and Rolling Pin: Place the Oreos in a sturdy zip-top bag, seal it, and use a rolling pin to crush them. This is a great stress reliever!
- Mortar and Pestle: For an old-school approach, you can use a mortar and pestle if you have one handy.
Whichever method you choose, aim for a crumb that’s not too fine – you want a little texture in your no-bake Oreo cheesecake cups!
For more tips and tricks, check out this detailed guide on Oreo recipes that will inspire your creativity in the kitchen!
Conclusion on No-Bake Oreo Cheesecake Cups
Recap of the dessert’s appeal
In summary, no-bake Oreo cheesecake cups deliver the perfect combination of rich, creamy goodness with the satisfying crunch of everyone’s favorite cookie. They’re effortlessly simple to prepare and make for an elegant yet playful dessert that can impress at any gathering. Plus, who wouldn’t love a treat that requires zero baking?
Encouragement to try making them yourself
So why not take a few moments to whip up these delightful cups? With just a handful of ingredients and minimal effort, you can create a dessert that’s not only tasty but also fun to assemble. Whether for a cozy night in or a festive celebration, I promise these no-bake Oreo cheesecake cups will become a new favorite. Give them a shot, and let the compliments roll in! For more inspiration, you might check out this guide on other dessert ideas.
Printno-bake oreo cheesecake cups: easy indulgence for dessert lovers
These No-Bake Oreo Cheesecake Cups are a delightful and easy dessert for any occasion.
- Prep Time: 30 minutes
- Total Time: 2 hours 30 minutes
- Yield: 4 servings 1x
- Category: Dessert
- Method: No-Bake
- Cuisine: American
- Diet: Vegetarian
Ingredients
- 16 Oreo cookies
- 1/2 cup unsalted butter, melted
- 8 ounces cream cheese, softened
- 1/2 cup powdered sugar
- 1 teaspoon vanilla extract
- 1 cup heavy whipping cream
- 6 additional Oreo cookies, crushed for topping
Instructions
- In a food processor, crush the 16 Oreo cookies until fine crumbs form.
- Mix the crumbs with the melted butter and press into the bottom of serving cups.
- In a bowl, beat the softened cream cheese, powdered sugar, and vanilla extract until smooth.
- In another bowl, whip the heavy cream until stiff peaks form, then gently fold into the cream cheese mixture.
- Spoon the cream cheese mixture over the crust in the cups.
- Chill for at least 2 hours or until set.
- Top with crushed Oreo cookies before serving.
Notes
- Use a hand mixer if you don’t have a stand mixer for the cream cheese mixture.
- For a firmer cheesecake, increase the chilling time.
Nutrition
- Serving Size: 1 cup
- Calories: 400
- Sugar: 25g
- Sodium: 150mg
- Fat: 28g
- Saturated Fat: 16g
- Unsaturated Fat: 9g
- Trans Fat: 0g
- Carbohydrates: 35g
- Fiber: 1g
- Protein: 5g
- Cholesterol: 50mg
Keywords: No-Bake Oreo Cheesecake, Dessert, Easy Dessert, Cheesecake Cups, Oreo Dessert