Introduction to Homemade Chocolate Turtles
Making homemade chocolate turtles is an indulgent journey that’s well worth the effort. Some might wonder why they should take the time to craft these delightful treats when store-bought versions are readily available. The answer is simple: nothing compares to the taste and satisfaction of creating something from scratch. Let’s explore why making your own chocolate turtles can elevate your sweet snack game and bring joy to your kitchen.
Why homemade Chocolate Turtles are worth the effort
First, let’s talk about flavor. When you make chocolate turtles at home, you have full control over the ingredients. You can choose high-quality chocolate, fresh nuts, and even organic caramel. This not only enhances the overall taste but also ensures you aren’t consuming any unwanted preservatives or artificial additives. You can read more about the benefits of high-quality ingredients in this article from Healthline.
Next, consider the potential for customization. Why settle for the same old flavors when you can create a batch uniquely yours? Whether you prefer decadent dark chocolate, creamy milk chocolate, or a sprinkle of sea salt, the choice is entirely yours. Feeling adventurous? Add some spices or flavored extracts to the caramel for a surprising twist! You might find delightful ideas in a guide like this one from The Kitchn.
Additionally, making chocolate turtles can be a fantastic way to bond with friends or family. Gather your loved ones for a fun evening of chocolate-making; not only is it enjoyable, but you’ll also create memories that last longer than any store-bought treat. Plus, sharing your creations as gifts can be incredibly rewarding—imagine the smiles when your friends unwrap these delicious surprises!
Lastly, there’s an undeniable charm in homemade treats. Each turtle you craft carries your personal touch, making them feel special and heartfelt. Whether you use these delights for festive occasions or simply as a weekend treat, the love and effort you put into them will shine through.
In summary, taking the time to make homemade chocolate turtles is an experience enriched with flavor, creativity, and connection. Ready to dive into making these delicious morsels? Let’s get started!
Ingredients for Homemade Chocolate Turtles
Making chocolate turtles at home is an enjoyable experience, and it all starts with selecting the right ingredients. Here’s a simple breakdown to get you started!
Essential ingredients for rich Chocolate Turtles
To create that perfect chocolate turtle bliss, you’ll need:
- Pecans: A buttery flavor and satisfying crunch are essential. Use whole or halved pecans based on your preference.
- Caramel: Homemade caramel can take your turtles to the next level, but store-bought works just fine for a quicker fix!
- Chocolate: Dark, milk, or even white chocolate—pick your favorite for coating all those delicious treats!
Optional ingredients for personalized flavors
Want to customize your chocolate turtles? Consider these additions:
- Sea salt: A sprinkle on top enhances the sweet and savory flavor.
- Nut variations: Try almonds or walnuts for a twist on the classic recipe.
- Flavor extracts: A few drops of vanilla or almond extract can elevate the taste profile.
By experimenting with these ingredients, you’ll craft chocolate turtles that are uniquely yours! Want more tips or inspiration? Check out expert baking blogs like Joy of Baking or Serious Eats for more culinary wisdom. Happy baking!
Preparing Homemade Chocolate Turtles
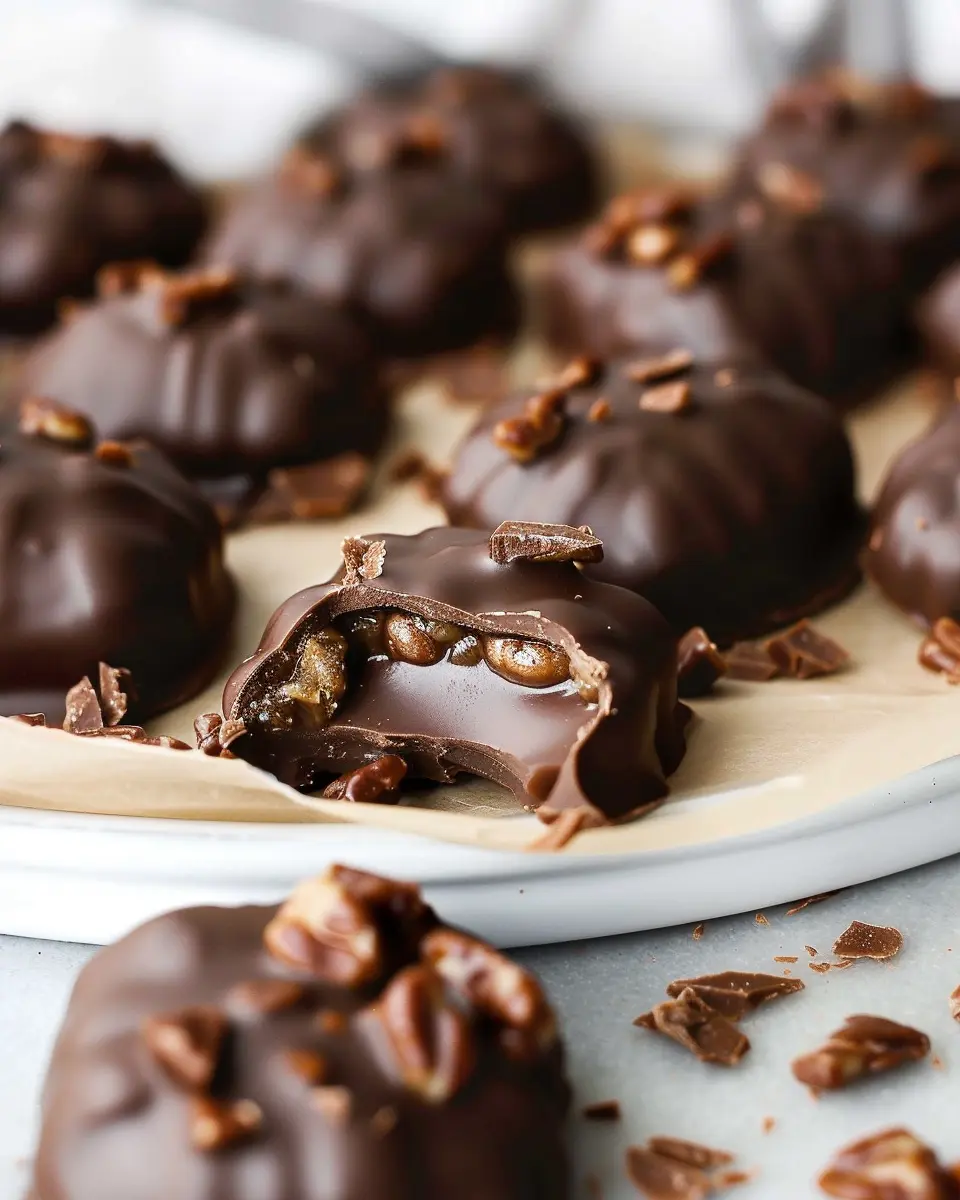
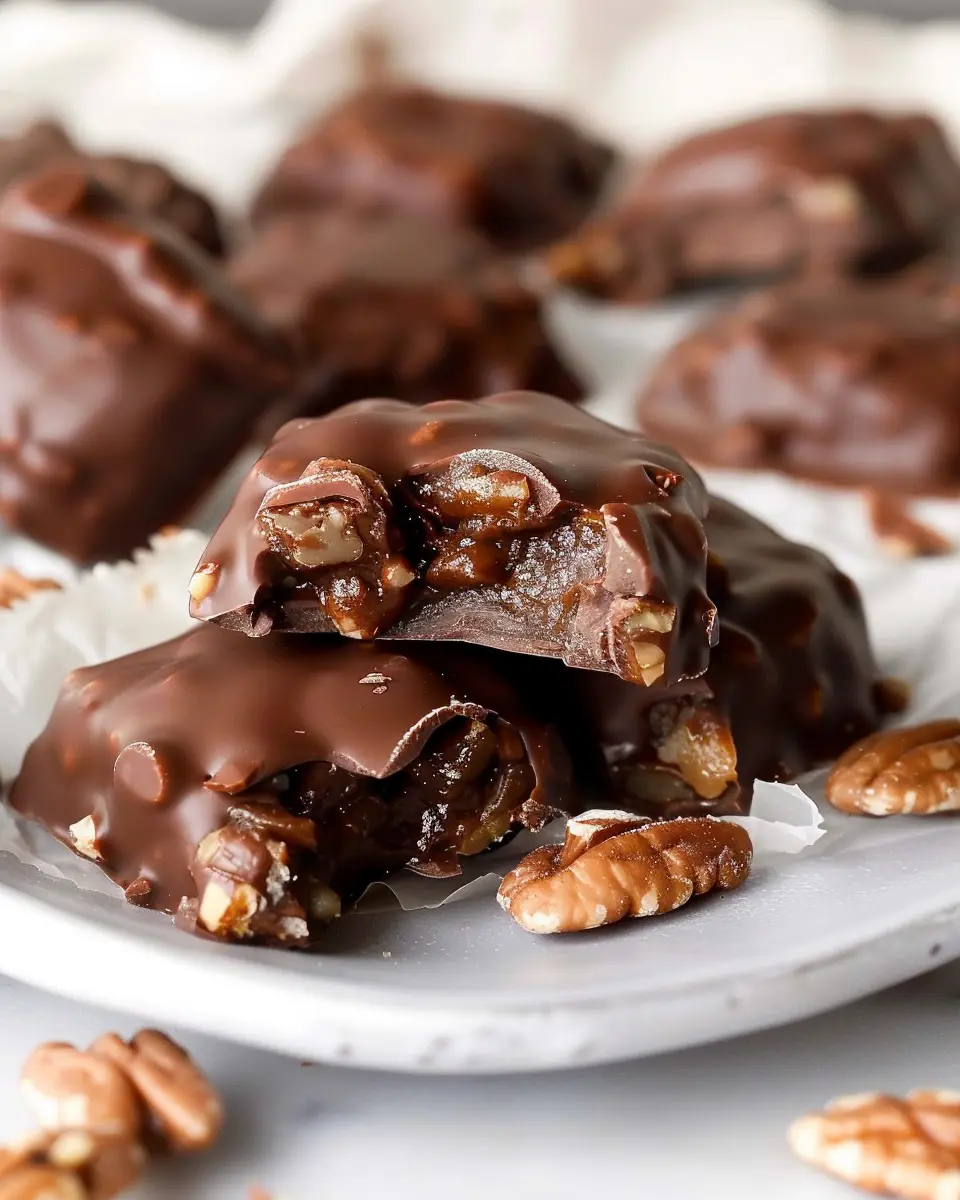
When it comes to indulgent treats, chocolate turtles stand out as a delicious and nostalgic choice. With their layers of crunchy pecans, chewy caramel, and silky chocolate, these little delights can be made right at home! Follow this step-by-step guide for a sweet adventure that’s sure to impress family and friends.
Preheat and Prepare Your Space
Before you dive into making your chocolate turtles, ensure you have a clean, organized workspace. Start by preheating your oven to 350°F (175°C) for toasting the pecans later. Clearing your countertops and gathering all your ingredients will save you a lot of hassle down the line. Make sure you have:
- Pecans
- Sweetened condensed milk
- Chocolate chips (milk, semi-sweet, or dark, depending on your preference)
- A microwave-safe bowl
- Baking sheets lined with parchment paper
Getting rid of distractions will help you focus on creating this delectable treat. Consider bringing a fun playlist to energize your kitchen vibe!
Toast and Chop Pecans for Crunch
Pecans are a key player in your chocolate turtles, providing that much-needed crunch. Spread your pecans on a baking sheet and pop them into the preheated oven for about 5-7 minutes until they are golden and fragrant.
Once toasted, let them cool slightly and then chop them roughly. It’s great to have a mix of whole pieces and smaller bits for added texture. If you want to learn more about the health benefits of nuts like pecans, check out the nutrition insights from the [California Walnut Board](https://www.cal walnuts.org).
Creating the Microwave Caramel
Now for the fun (and sticky) part—caramel! In a microwave-safe bowl, combine a can of sweetened condensed milk with a touch of vanilla extract. Microwave in intervals of 30 seconds, stirring in between, until the mixture is a lovely golden brown. This should take about 3-4 minutes total.
The secret to a creamy caramel is constant stirring, so don’t skip this step! Once ready, you’ll have a luscious liquid that’s just begging to be poured over those crunchy pecans.
Forming the Turtle Clusters
It’s time to assemble your chocolate turtles! On a lined baking sheet, scoop small spoonfuls of the chopped pecans, leaving a little space in between each. Next, drizzle or spoon the warm caramel over the pecans. You want to aim for about a tablespoon per cluster, but this can vary depending on your love for caramel!
After forming your clusters, pop the tray in the refrigerator for about 30 minutes to let the caramel firm up—it’s worth the wait!
Melting the Chocolate for Dipping
While your caramel is setting, get started on the chocolate. You might prefer milk chocolate for a classic taste, or go dark for a sophisticated twist. In a microwave-safe bowl, heat your chocolate chips in 30-second intervals, stirring frequently, until it’s smooth and melted.
You can also use a double boiler if you prefer a more controlled melting process—whichever works best for you. Just keep an eye on the heat to avoid burning!
Dipping and Setting Your Chocolate Turtles
Once the caramel is nice and firm, it’s time for the grand finale: dipping! Take each turtle cluster and plunge it into the melted chocolate, ensuring it’s well-coated. Use a fork to lift it out and let any excess chocolate drip off before placing it back on the parchment-lined sheet.
After all your chocolate turtles are dipped, return them to the fridge for another 15-20 minutes to set the chocolate. Once everything is firm, feel free to get creative—add extra drizzling of chocolate on top, or sprinkle sea salt for a gourmet touch!
And just like that, you’ve created homemade chocolate turtles that are perfect for snacking, gifting, or simply indulging yourself. Sharing these rich and delightful treats will undoubtedly make you the star of any gathering!
Variations on Chocolate Turtles
Nut-free Chocolate Turtles
Looking for a delicious treat that fits a nut-free diet? You can easily make chocolate turtles without nuts! Instead of pecans or walnuts, try using crispy rice cereal or sunflower seeds for that delightful crunch and texture. Simply mold your caramel around these ingredients for a nutty experience minus the nuts! You might even consider pairing it with a dollop of creamy sunflower seed butter for an extra rich flavor that packs a punch.
Dark Chocolate Alternative
If you’re a fan of that deep, rich taste, consider using dark chocolate for your chocolate turtles. With cocoa content ranging from 60% to 90%, dark chocolate is not only a decadent option but also brings antioxidant benefits. The slight bitterness of dark chocolate beautifully balances the sweetness of the caramel, creating a treat that’s gourmet enough for any occasion. Plus, dark chocolate tends to melt more slowly, allowing you to savor every bite.
Flavor Infusions: Adding Sea Salt or Espresso
Take your chocolate turtles to the next level by incorporating flavors like sea salt or espresso. A sprinkle of flaky sea salt on top adds a sophisticated touch, enhancing the chocolate and caramel flavors with its slightly savory burst. Alternatively, for the coffee lovers out there, mixing espresso powder into your caramel will bring a delightful depth and richness that is truly irresistible.
For more ideas on flavor variations or to find high-quality chocolates to try, check out sources like Serious Eats or The Kitchn. Enjoy experimenting with these twists on a classic treat!
Baking notes for Homemade Chocolate Turtles
Creating the perfect chocolate turtles at home can be a delightful experience. Here are some insider tips to guide you through the process.
Tips for ensuring perfect caramel
Getting your caramel right is crucial. Here are some expert tips to achieve that gooey perfection:
- Use a candy thermometer: This device can help you monitor the temperature closely. Aim for the caramel to reach about 240°F (soft ball stage).
- Don’t rush it: Patience is key! Cook on medium heat and stir consistently to prevent burning.
- Watch the humidity: Humid days can impact caramel consistency. Consider making it on a drier day for more reliable results.
For more detailed guidance on caramel, check out this caramel making guide.
Choosing the right chocolate for dipping
The chocolate you choose plays a major role in flavor and texture. Here are a few suggestions:
- Go for quality: Look for high-quality chocolate with at least 60% cocoa. Brands like Ghirardelli or Guittard are excellent choices.
- Consider melting chocolate: If you’re looking for ease, melting chocolate wafers melt smoothly and coat evenly, giving you that signature shine.
- Flavor pairing: Dark chocolate complements the sweetness of the caramel while milk chocolate can offer a milder taste.
With these tips in hand, your chocolate turtles are sure to impress everyone. Happy baking!
Serving suggestions for Chocolate Turtles
Creative ways to present your Chocolate Turtles
Making chocolate turtles is a delightful process, but don’t stop at just the taste! Presentation is key. Think about using cute, decorative boxes or small clear bags tied with a ribbon for gift-giving. For parties, arrange them on a tiered serving tray for an elegant touch. You could also serve them on colorful plates alongside fresh fruit like strawberries or slices of orange—they not only add a pop of color but balance the sweetness, making the taste experience even more satisfying.
Pairing suggestions for desserts
When it comes to pairing, why not bring out the richness of chocolate turtles with a scoop of vanilla or sea salt caramel ice cream? The contrast in flavors can elevate your dessert game. A light coffee could also complement the chocolate’s richness beautifully, creating a delightful post-meal treat. If you’re feeling adventurous, try pairing your turtles with gourmet teas, such as chai or mint, for an unexpected twist that will surprise your guests.
For more presentation ideas and dessert pairings, check out this helpful article on dessert styling and explore different options.
Tips for Making Perfect Chocolate Turtles
Avoiding Common Pitfalls During Preparation
Creating delicious chocolate turtles requires attention to detail. Here are some common pitfalls and how to steer clear of them:
- Melt Chocolate Carefully: Instead of using a microwave, try the double boiler method for melting chocolate. This gives you better control and prevents burning.
- Watch the Caramel: Make sure to cook your caramel until it’s a rich golden color. Undercooked caramel can be too sticky, while overcooked can harden and break when bitten.
- Layering: For the best texture, ensure the caramel cools slightly before drizzling it over the nuts. This prevents it from mixing into the chocolate later.
How to Store Chocolate Turtles for Maximum Freshness
Once your chocolate turtles are beautifully crafted, proper storage is key to keeping them fresh:
- Cool Down Before Storing: Allow them to cool completely on a wire rack. This prevents condensation, which can lead to a sticky mess.
- Use Airtight Containers: Place your turtles in an airtight container with parchment paper between layers to avoid sticking.
- Store in a Cool Place: Ideally, keep them in a cool, dry location. If you live in a warm climate, consider storing them in the refrigerator for added freshness.
By following these tips, you can craft and enjoy chocolate turtles that are not only visually appealing but absolutely delightful in taste. For more insights on dessert storage, check out resources from the USDA Food Safety and Inspection Service.
Time details for Homemade Chocolate Turtles
Preparing to make your own delicious chocolate turtles is an exciting adventure! Here’s how your timeline will look:
Preparation time
Getting everything ready takes about 20 minutes. During this time, you’ll want to melt your chocolate, roast your pecans, and set up your turtle “assembly line.”
Cooking time
The actual cooking involves a sweet caramelization process, which will take an additional 15 minutes. This is where the magic happens, and you see your ingredients transform into something special!
Total time
In just 35 minutes, you’ll have your homemade chocolate turtles ready to indulge in or gift to friends. It’s a quick treat that packs a punch of flavor! If you’re eager to learn more about caramel making, check out this in-depth guide from The Spruce Eats for some extra tips. Enjoy your chocolatey creation!
Nutritional information for Chocolate Turtles
Calories and serving size
When indulging in your delicious chocolate turtles, it’s helpful to know that one serving (around 2 pieces) typically contains about 150-200 calories. This can vary slightly based on your recipe variations, but it’s a handy guideline to keep in mind if you’re mindful of your snacking.
Key nutrients and dietary considerations
These delectable treats offer a blend of nutrients you’ll want to consider:
- Healthy Fats: Made with nuts, chocolate turtles are a source of healthy fats that can be beneficial for heart health.
- Protein: The nut component can provide a nice protein boost, helping you feel more satisfied between meals.
- Sugar: Like most desserts, they do contain sugar, so moderation is key.
If you’re looking to make lighter versions, consider using dark chocolate, which not only enhances the flavor but also offers antioxidants. For more in-depth info, check out the USDA Nutrient Database to analyze specific ingredients in your favorite chocolate turtles recipe.
Remember that while they’re a delightful treat, chocolate turtles should be enjoyed in moderation, especially as part of a balanced diet!
FAQs about Homemade Chocolate Turtles
Can I substitute ingredients in the recipe?
Absolutely! One of the best things about making homemade chocolate turtles is the flexibility you have with ingredients. If you’re not a fan of pecans, for instance, you can swap them out for walnuts or almonds. Similarly, if you don’t have semi-sweet chocolate on hand, dark or milk chocolate can be a delightful alternative. Just keep in mind that these changes can alter the flavor profile a bit, so feel free to experiment and find your perfect combination!
How do I store chocolate turtles long-term?
Storing your chocolate turtles correctly can extend their shelf life, allowing you to savor them longer. Once they’ve cooled completely, place them in an airtight container. You can layer parchment paper between the layers of turtles to prevent sticking. For optimal freshness, keep them in a cool, dark place. If you want to store them for even longer, consider freezing them. Just remember to let them come to room temperature before enjoying them again!
What if the caramel doesn’t set properly?
If your caramel seems too runny, don’t panic—it happens to the best of us! The key issue often lies in the cooking time. Make sure to monitor the temperature closely using a candy thermometer; you want it to reach about 240°F (soft ball stage). If your caramel doesn’t set after cooling, try re-heating it gently and adding a touch more sugar. It’s all part of the learning experience, so don’t hesitate to experiment until you find what works best for you!
For more tips on cooking techniques, check out The Kitchn to elevate your kitchen skills even further!
Conclusion on Homemade Chocolate Turtles
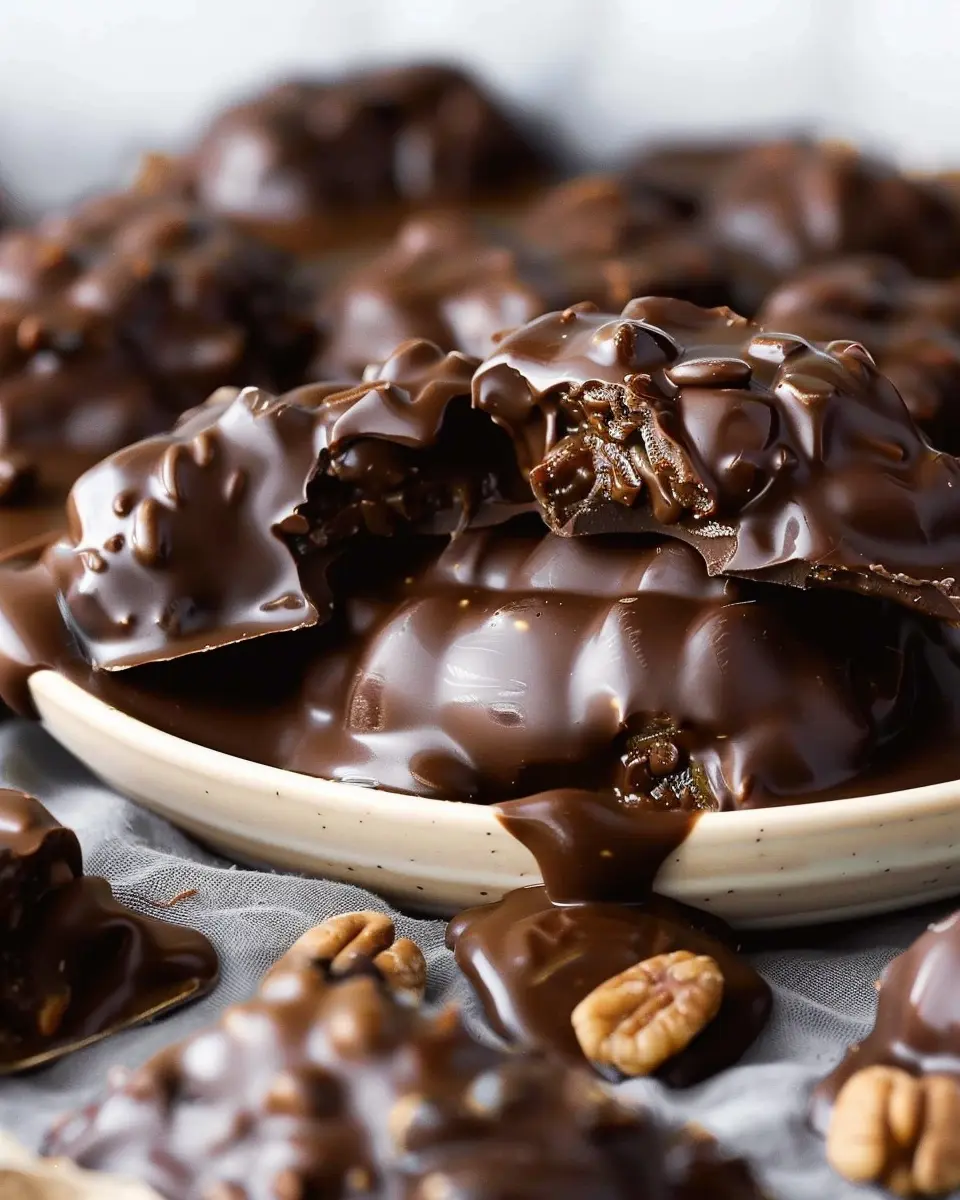
Creating homemade chocolate turtles is not just about making a treat; it’s about celebrating the joy of crafting delicious memories. From the creamy caramel to the crunchy nutty center, each bite is a delicious reminder of the simple pleasures in life.
When you handcraft these delightful sweets, you’re not only customizing the flavors but also adding a touch of love and creativity to your snacks. Whether served at a party or given as gifts, your homemade chocolate turtles are sure to leave a lasting impression. So gather your ingredients, invite a friend, and enjoy the delightful process of making your own treats!
For expert tips on chocolate-making, check out resources like Serious Eats and The Kitchn.
PrintChocolate Turtles: Easy Indulgence for Homemade Treat Lovers
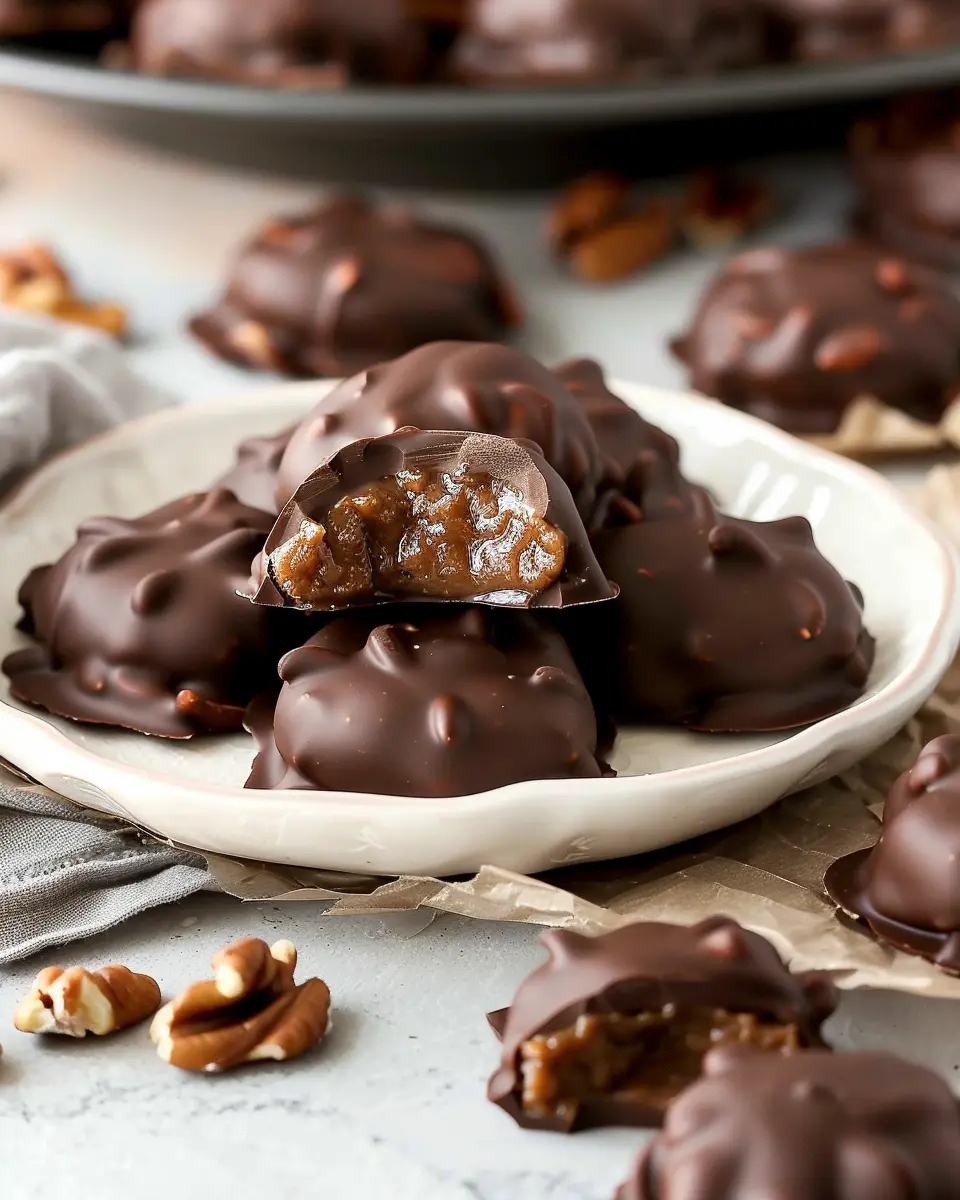
Delight in the delicious combination of chocolate, caramel, and pecans with these easy-to-make Chocolate Turtles.
- Prep Time: 15 minutes
- Cook Time: 10 minutes
- Total Time: 25 minutes
- Yield: 24 pieces 1x
- Category: Dessert
- Method: Baking
- Cuisine: American
- Diet: Gluten-Free
Ingredients
- 1 cup pecan halves
- 1 cup soft caramel candies
- 1 cup semi-sweet chocolate chips
Instructions
- Preheat your oven to 350°F (175°C).
- Arrange pecan halves on a baking sheet in groups of three.
- Melt the caramel candies in a microwave-safe bowl, stirring frequently.
- Pour a spoonful of melted caramel over each group of pecans.
- In a separate bowl, melt the chocolate chips in the microwave.
- Drizzle the melted chocolate over the caramel-covered pecans.
- Let them cool until set.
Notes
- These can be made ahead of time and stored in an airtight container.
- Substitute chocolate with white chocolate for a different taste.
Nutrition
- Serving Size: 2 pieces
- Calories: 150
- Sugar: 18g
- Sodium: 50mg
- Fat: 8g
- Saturated Fat: 4g
- Unsaturated Fat: 3g
- Trans Fat: 0g
- Carbohydrates: 16g
- Fiber: 1g
- Protein: 2g
- Cholesterol: 10mg
Keywords: Chocolate Turtles