Introduction to Classic Apple Crisp
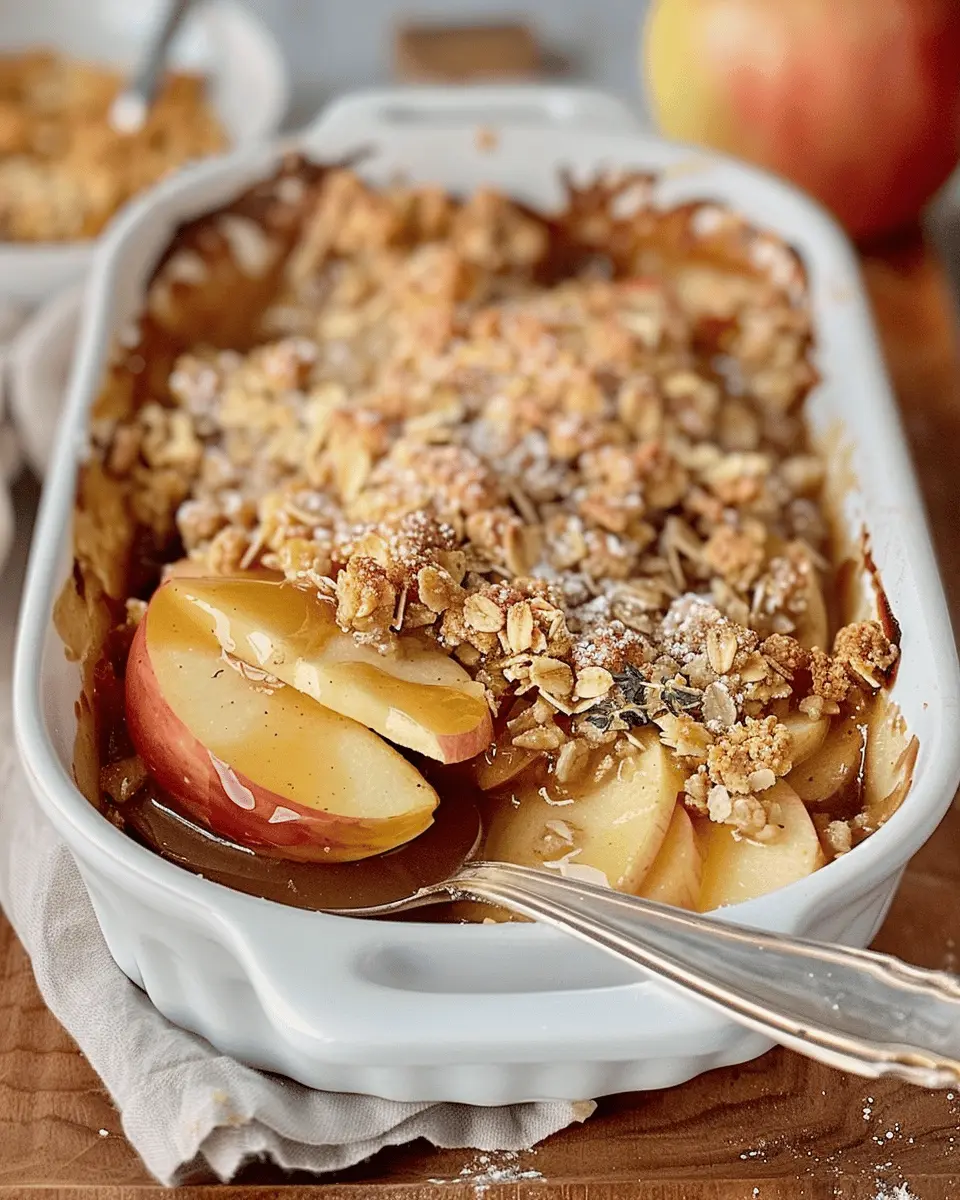
There’s something inherently delightful about the classic apple crisp that just warms your heart. Imagine walking into a cozy kitchen where the sweet aroma of baked apples fills the air, topped with a buttery, crunchy oat topping. It’s a dessert that beckons you to indulge, inviting memories of family gatherings and cozy nights in. So, why is this dessert considered the ultimate comfort food?
Why Classic Apple Crisp is the Ultimate Comfort Dessert
A classic apple crisp offers not just a unique flavor combination, but also a sense of nostalgia. It’s a dish that often reminds people of their childhood, perhaps of a beloved grandparent pulling a bubbling dish from the oven and serving it warm, with a scoop of vanilla ice cream melting on top. According to a survey by the American Pie Council, over 75% of Americans associate dessert with feelings of comfort and happiness. This speaks volumes about why apple crisp enjoys unfailing popularity—it connects us to our roots and the warmth of family.
Moreover, apple crisp is supremely adaptable. You can tweak it based on what’s available in your pantry or personal dietary preferences. Prefer a gluten-free option? Swap out traditional oats for certified gluten-free ones and you’re set. Want to add a little exciting flair? Consider mixing in some spices like cinnamon or nutmeg, or even a handful of raisins for added texture and flavor.
The beauty of a classic apple crisp is that it’s straightforward, making it an ideal recipe for novice bakers and seasoned chefs alike. The ingredients are simple:
- Fresh apples
- Oats
- Brown sugar
- Flour
- Butter
And it comes together quickly, making it a go-to recipe for unexpected guests or those nights when you just need a little something sweet to lift your spirits.
For a deeper dive into baking techniques or apple varieties, feel free to explore resources like The Kitchn or Serious Eats. With this recipe, you’re not just about to create dessert; you’re about to make memories.

Ingredients for Classic Apple Crisp
Essential ingredients for the apple mixture
Creating the apple mixture is where your classic apple crisp begins to take shape. For the best flavors, you need:
- Apples: Aim for about 6 medium-sized apples that are great for baking. Varieties like Granny Smith, Honeycrisp, or Fuji bring a perfect combination of tartness and sweetness.
- Sugar: Both brown sugar and granulated sugar can enhance the apples’ natural sweetness. About 1/2 cup of each should do the trick.
- Cinnamon: This warm spice adds depth and richness with about 1 teaspoon being the sweet spot.
- Lemon Juice: A tablespoon of fresh lemon juice brightens the flavor and helps balance the sweetness.
Looking for a deeper dive into apple varieties? Check out this guide for more tips!
Key ingredients for the crisp topping
The crisp topping is what takes your apple dessert to the next level. Here’s what you’ll need:
- Oats: Approximately 1 cup of rolled oats provides an incredible texture and heartiness.
- Butter: Melted butter (around 1/2 cup) ties it all together. For a healthier take, consider using coconut oil.
- Flour: About 1/2 cup of all-purpose flour ensures a crumbly consistency.
- Nuts: Optional but recommended, 1/2 cup of chopped pecans or walnuts adds a nice crunch.
By combining these delightful ingredients, you’ll create a classic apple crisp that’s sure to impress friends and family alike. Now, let’s get baking!
Preparing Classic Apple Crisp
Making a Classic Apple Crisp from scratch can be one of the most rewarding culinary experiences. It’s the perfect combination of tender apples and a crunchy topping that brings comfort to any table. Let’s guide you step-by-step through the preparation process to ensure your dessert is a hit!
Preheat and Prepare Your Baking Dish
Before diving into the ingredients, it’s essential to set the stage for your Classic Apple Crisp. Preheat your oven to 350°F (175°C). This will ensure that your dish bakes evenly and reaches that perfect golden brown color. While the oven warms up, grab an 8×8 or 9×9 baking dish and lightly grease it with butter or non-stick cooking spray. This simple step prevents your crisp from sticking and makes for easier serving later on.
Combine the Apple Filling Ingredients
Now for the star of the show: the apples! You’ll need about six medium-sized apples, a mix of sweet and tart varieties—think Granny Smith and Honeycrisp for balance.
In a large mixing bowl, peel, core, and slice the apples. Add:
- 1 tablespoon of fresh lemon juice (to prevent browning and add brightness)
- 1/2 cup of brown sugar (for sweetness)
- 1 teaspoon of ground cinnamon (for that warm, cozy flavor)
Toss everything together until the apple slices are evenly coated. This mixture will not only provide the foundational flavor but also create a deliciously fruity filling during baking. Let it sit for about 10-15 minutes while you prepare the crisp topping.
Mix the Crisp Topping Ingredients
Now let’s make that irresistible topping! In a separate bowl, combine:
- 1 cup of rolled oats
- 1/2 cup of all-purpose flour
- 1/2 cup of brown sugar
- 1/2 teaspoon of ground cinnamon
- 1/2 cup of cold butter, cut into small pieces
Using your fingers or a fork, blend all the ingredients until you have a crumbly texture. The key here is to leave some pea-sized chunks of butter, which will give your crisp its signature crunch when baked.
Layer the Apple Mixture and Crisp Topping
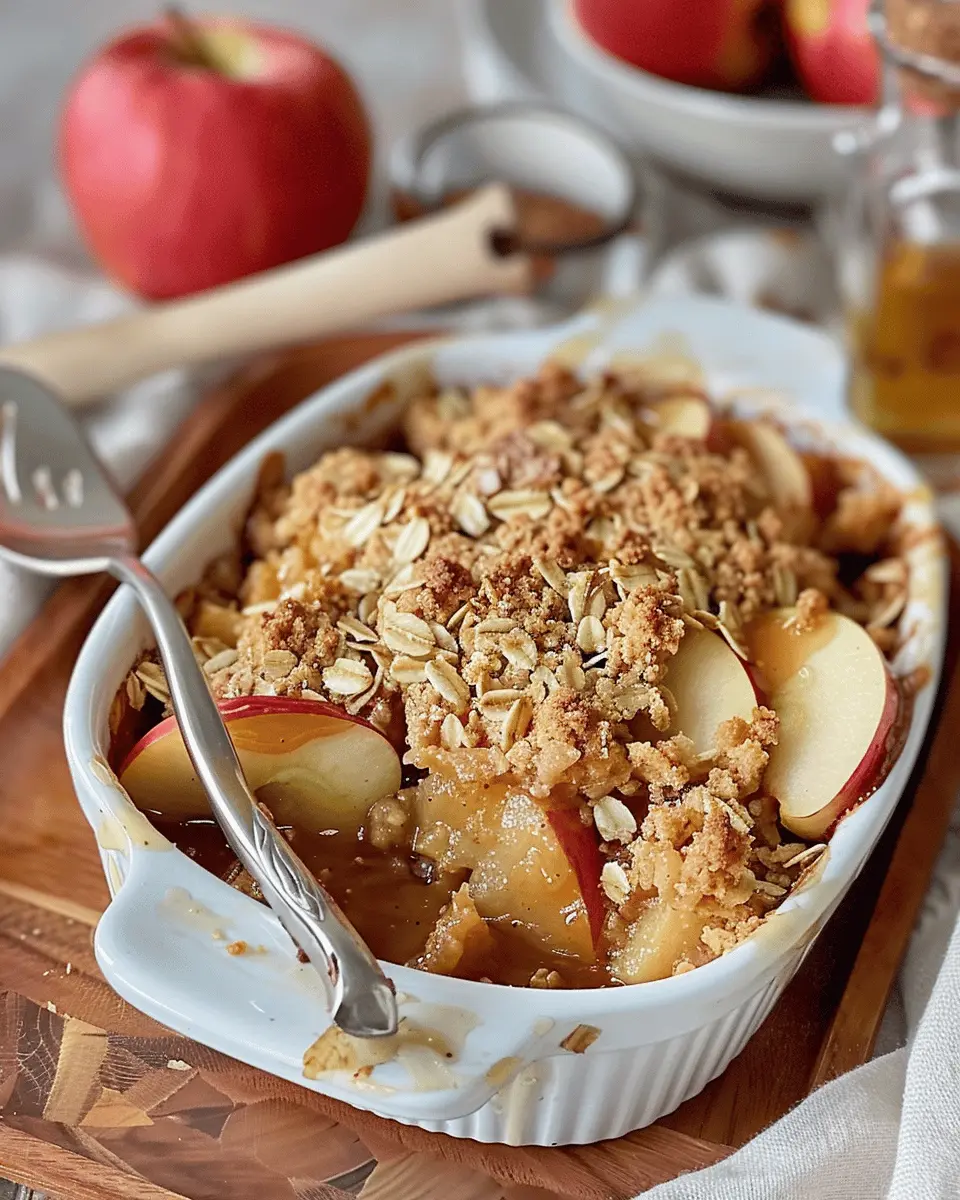
Once your apple filling is ready and the topping is beautifully mixed, it’s time for assembly! Start by pouring the apple mixture into your prepared baking dish, spreading it evenly. Next, sprinkle the crisp topping generously over the apples. Don’t hesitate to pile it on; this crispy layer is just as important as the apples themselves!
Bake to Perfection
Now, it’s time for the magic to happen! Place your assembled Classic Apple Crisp into the preheated oven and bake for about 30-40 minutes, or until the topping is golden brown and the apple filling is bubbling.
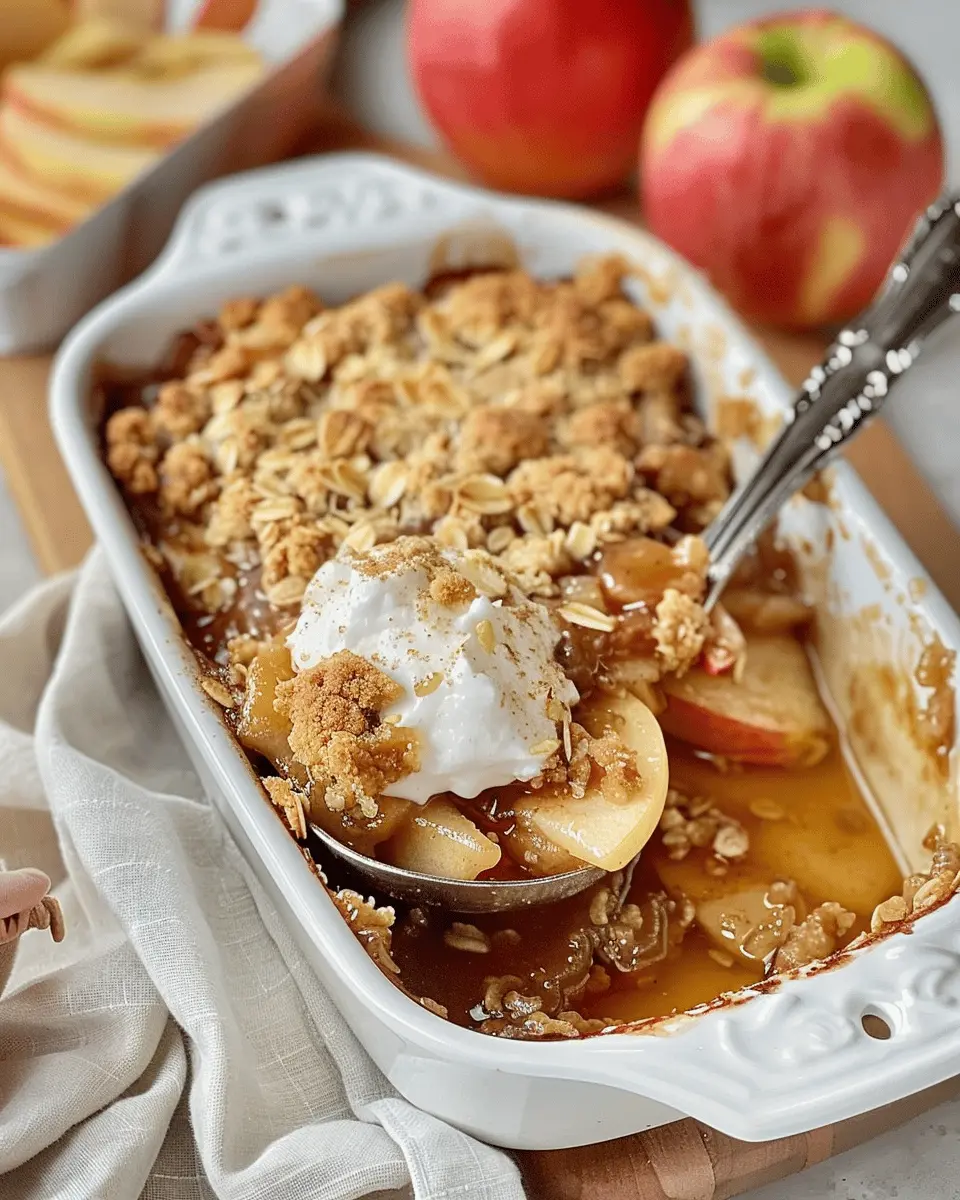
To check for doneness, look for that lovely golden crust and a soft bubbling around the edges. If you want to make this dessert even more special, you can consider adding a scoop of vanilla ice cream on top; it’s a classic combination that never disappoints.
Finally, let your crisp cool for a few minutes before serving. This helps the flavors meld together beautifully.
Conclusion
There you have it! A deliciously simple Classic Apple Crisp that will impress your friends, family, or even just yourself after a long day. It’s affordable, straightforward, and a celebration of flavors that gives you just the right amount of warmth and nostalgia. You can even explore variations to include nuts or different spices, depending on your taste. Enjoy your baking journey!
For more cooking inspiration and tips, consider checking out The Kitchn or Delish for exciting recipes and culinary guidance. Happy baking!
Variations on Classic Apple Crisp
Apple crisp is a beloved dessert that can easily be tailored to suit your taste preferences. Let’s explore some delightful twists on the classic apple crisp that will excite your palate!
Fun Twists: Adding Nuts and Dried Fruit
One of the easiest ways to elevate your classic apple crisp is by incorporating nuts or dried fruit. Consider:
- Walnuts or Pecans: Add a handful of chopped nuts to the topping for a delicious crunch. They pair wonderfully with the soft, warm apples.
- Raisins or Dried Cranberries: Mixing in some dried fruit can introduce a hint of sweetness and a chewy texture. Just a cup can really enhance the overall flavor profile.
You might even want to try experimenting with nut butters—swirling a bit of almond or peanut butter into your filling can give it a unique twist.
Embrace Seasonal Flavors: Pumpkin Spice Apple Crisp
As the leaves begin to turn, there’s nothing quite like a pumpkin spice apple crisp. Imagine combining the traditional flavors of apple crisp with the warm spices typical of fall. Simply add:
- Pumpkin Pie Spices: Incorporate cinnamon, nutmeg, and allspice into your apple mixture.
- Pumpkin Puree: Swapping in some pumpkin puree for a portion of your apple filling creates a rich, autumnal flavor that celebrates the season.
Want to take it a step further? Click here for tips on making the ultimate pumpkin dessert from Epicurious.
These variations ensure that your classic apple crisp is never boring, adapting perfectly to any season or occasion. Enjoy these changes, and who knows? You might discover a new favorite way to enjoy this timeless dessert!
Cooking Tips and Notes for Classic Apple Crisp
Choosing the Best Apples for Your Crisp
When making a Classic Apple Crisp, picking the right apples is crucial. Aim for a blend of sweet and tart varieties to achieve maximum flavor. Popular choices include Granny Smith for tartness and Honeycrisp for sweetness. Mixing these will give your dish both delicious complexity and the perfect texture.
Feeling adventurous? Try adding a few Gala apples for extra sweetness! Remember, avoid mushy varieties that can turn your crisp soggy. For more insights on apple varieties, explore the USDA’s apple variety guide.
Common Mistakes to Avoid While Baking
Avoid these pitfalls to elevate your Classic Apple Crisp:
- Don’t skimp on the cinnamon: A hint of warmth is essential for flavor.
- Prioritize your oat mixture: Ensure it’s crumbly but not too dry. Balance is key!
- Underbaking or overbaking: Keep an eye on your crisp; it should be golden brown and bubbling.
Keeping these tips in mind will definitely make your dessert a hit at your next gathering!
Serving Suggestions for Classic Apple Crisp
When it comes to serving Classic Apple Crisp, the right accompaniments can elevate your dessert experience.
Pairing with Dairy-Free Ice Cream or Whipped Topping
For a delightful contrast to the warm, spiced fruit and crispy topping, consider adding a scoop of dairy-free ice cream or a dollop of whipped topping. Not only does this add a creamy texture, but the coolness of the ice cream also complements the warmth of the crisp beautifully. If you’re looking for recommendations, check out brands like So Delicious for delicious dairy-free options. Or, opt for homemade whipped coconut cream for a simple yet indulgent touch.
Creative Serving Dishes to Impress Guests
Presentation can make all the difference! Serve your Classic Apple Crisp in individual ramekins for that upscale restaurant feel. Not only does this make serving simple, but it also allows guests to enjoy their own personal portion. Alternatively, consider using a rustic cast-iron skillet or a decorative pie dish for a homey touch that sparks conversation.
Whether you’re hosting a dinner party or just indulging solo, these serving suggestions will make your Classic Apple Crisp shine!
Time Breakdown for Classic Apple Crisp
Preparation Time
To whip up this delightful Classic Apple Crisp, you’ll need about 15-20 minutes for preparation. This time includes washing, peeling, and slicing the apples, as well as mixing the crisp topping. It’s a quick and straightforward process, perfect for a weekday treat or a weekend dessert.
Baking Time
Once everything is assembled, pop it in the oven and let it bake for 30-35 minutes. You’ll know it’s ready when the topping is golden brown and the apples are bubbling. The aroma? Absolutely irresistible!
Total Time
In total, you’re looking at roughly 45-55 minutes from start to finish. With just one hour of your time, you can indulge in a warm, comforting dessert that’s sure to impress your friends or family. For more tips and recipes, check out Epicurious or Food Network.
Nutritional Facts for Classic Apple Crisp
Estimated calories per serving
A serving of Classic Apple Crisp typically contains around 200 to 250 calories. This can vary based on portion size and the amount of sugar and butter used in the recipe. If you’re looking for a lighter version, consider reducing the sugar or using a sugar substitute.
Key nutrients to note
When you indulge in this delightful dessert, you’re not just satisfying your sweet tooth. Here are some key nutrients found in Classic Apple Crisp:
- Fiber: Apples are a great source of dietary fiber, which supports digestion and helps you feel full.
- Vitamins: The fruit is packed with vitamin C, essential for maintaining a healthy immune system.
- Antioxidants: Apples contain antioxidants that are beneficial for heart health.
Using wholesome ingredients like oats and nuts can further enhance the nutritional profile. Explore this USDA resource for detailed nutritional information on common ingredients.
Want to make your Classic Apple Crisp even more nutritious? Try adding a handful of nuts for additional protein and healthy fats. Who knew dessert could also be a guilt-free treat?
FAQs about Classic Apple Crisp
When it comes to comfort desserts, Classic Apple Crisp holds a special place in our hearts. Here are some common questions to help you make the most of this delicious dish.
Can I make apple crisp ahead of time?
Absolutely! You can prepare the filling and oat topping separately and store them in the refrigerator for up to 24 hours. Just before you’re ready to serve, assemble everything in your baking dish and pop it in the oven. This not only saves time but also allows the flavors to meld together beautifully. If you want to go a step further, you can even freeze the assembled apple crisp. Just bake it straight from the freezer, adding a few extra minutes to the baking time for that perfect crisp.
What other fruits can I use?
Classic Apple Crisp doesn’t have to be limited to apples! Feel free to experiment with other fruits like pears, peaches, or even berries. A mix of apples and cranberries, for example, adds a delightful tartness. If you’re unsure what pairs well, check out seasonal fruit guides or recipes on sites like EatingWell.
How do I store leftover apple crisp?
Storing leftover Classic Apple Crisp is simple. Once it has cooled, cover it tightly with aluminum foil or plastic wrap and keep it in the refrigerator. It should remain fresh for up to 3-4 days—though I bet it won’t last that long! To reheat, pop it back in the oven at a low temperature until warmed through, or microwave it for a quick fix. It’s just as comforting the next day!
If you have any more questions or tips, feel free to share in the comments below! Happy baking!
Conclusion on Classic Apple Crisp
The joy of homemade desserts and creating memories
There’s something undeniably special about preparing a Classic Apple Crisp in the comfort of your kitchen. The aroma of baking apples mingled with cinnamon creates a cozy backdrop, inviting friends and family to gather around. This beloved dessert not only satisfies your sweet tooth but also offers an opportunity to create lasting memories. Inviting loved ones to help peel apples or layering the crisp topping can be a delightful bonding experience.
Furthermore, homemade desserts like a Classic Apple Crisp provide a personal touch that store-bought options simply can’t match. So, next time you want to impress or simply enjoy a slice of nostalgia, whip up this comforting treat and relish in the joy it brings. Consider checking out more on the importance of cooking together here.
Your homemade creation is more than just a dessert; it’s a celebration of the moments that make everyday life extraordinary.
PrintClassic Apple Crisp: The Best Homemade Dessert You’ll Love

Indulge in the perfect blend of sweet and tart with this Classic Apple Crisp, a homemade dessert that’s both comforting and delicious.
- Prep Time: 15 minutes
- Cook Time: 40 minutes
- Total Time: 55 minutes
- Yield: 8 servings 1x
- Category: Dessert
- Method: Baking
- Cuisine: American
- Diet: Vegetarian
Ingredients
- 6 cups sliced apples
- 1 cup rolled oats
- 1 cup brown sugar
- 1/2 cup all-purpose flour
- 1 tsp ground cinnamon
- 1/2 cup unsalted butter, melted
- 1/4 tsp salt
Instructions
- Preheat your oven to 350°F (175°C).
- In a large bowl, combine sliced apples with cinnamon and salt.
- In another bowl, mix oats, flour, brown sugar, and melted butter until crumbly.
- Pour the apple mixture into a baking dish and top with the oat mixture.
- Bake for about 40 minutes or until the apples are tender and the topping is golden.
- Let cool slightly and serve warm.
Notes
- For extra flavor, consider adding nuts or raisins to the oat topping.
- Serve with vanilla ice cream or whipped cream for the ultimate dessert experience.
Nutrition
- Serving Size: 1 serving
- Calories: 300
- Sugar: 25g
- Sodium: 150mg
- Fat: 12g
- Saturated Fat: 7g
- Unsaturated Fat: 3g
- Trans Fat: 0g
- Carbohydrates: 45g
- Fiber: 4g
- Protein: 3g
- Cholesterol: 30mg
Keywords: Classic Apple Crisp, apple dessert, homemade dessert, baking