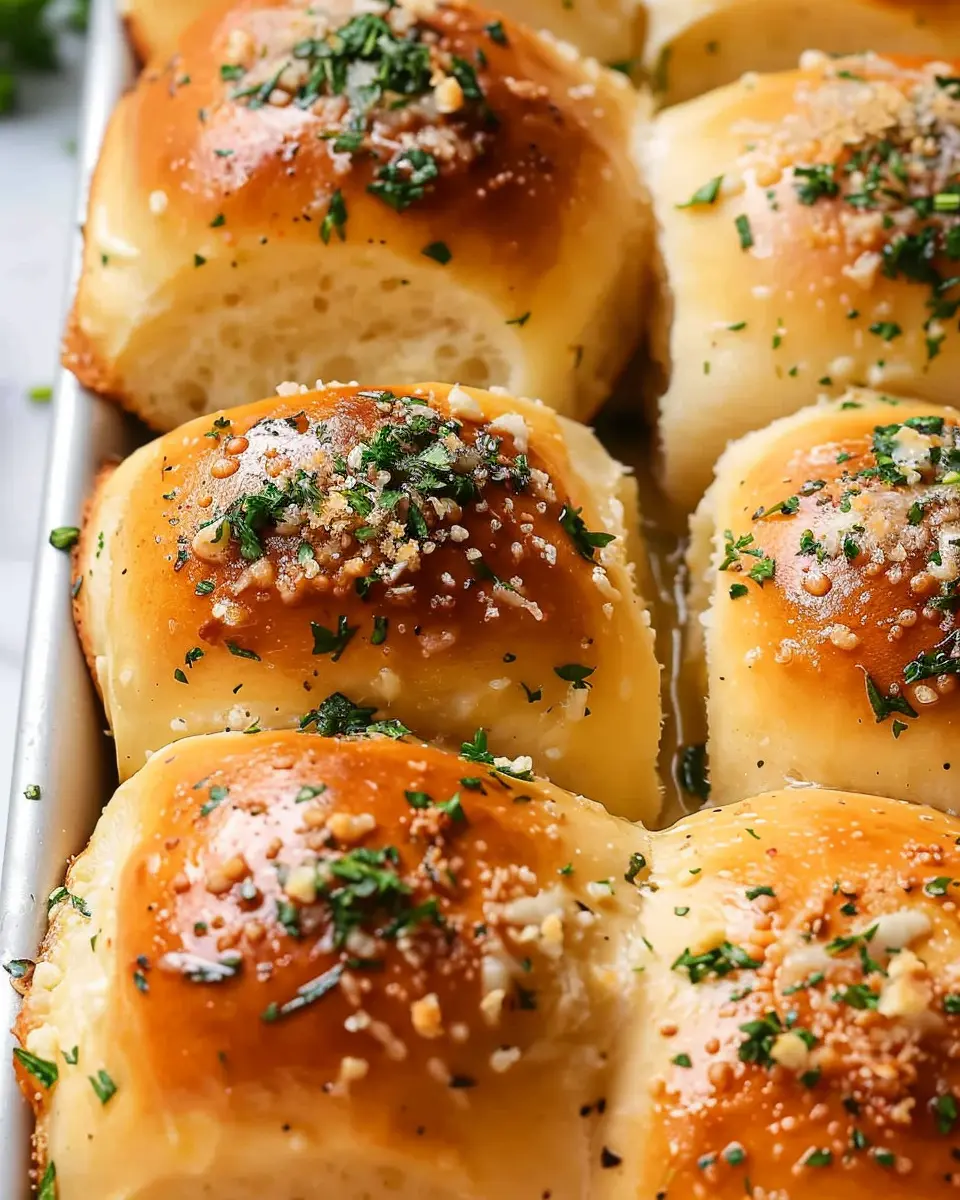
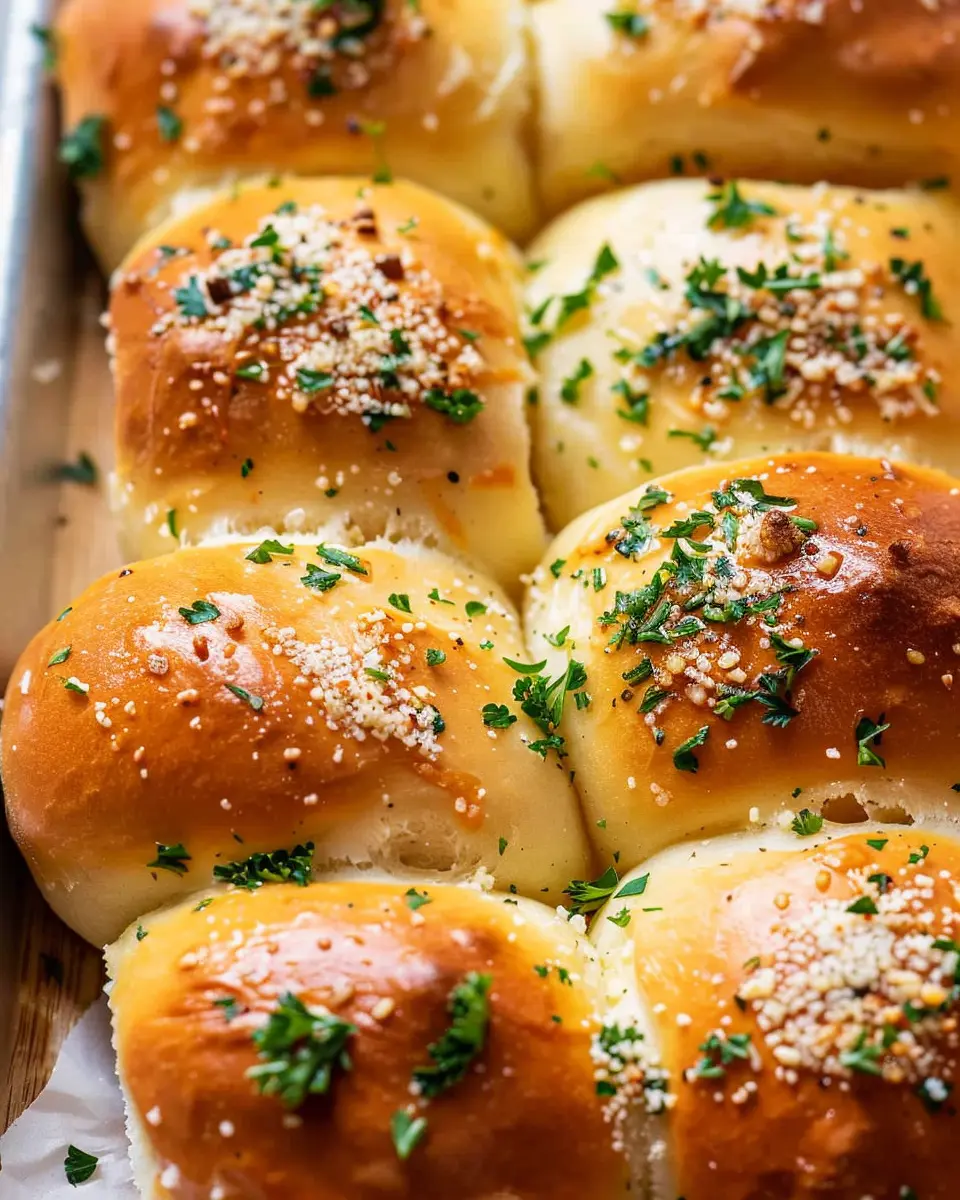
The Joy of Homemade Garlic Bread Rolls
If there’s one thing I love about cooking, it’s transforming simple ingredients into something truly delightful. Garlic bread rolls are a perfect example of this magic. These fluffy, buttery delights not only make a fantastic side for dinner but also stand out as a standalone snack.
Why Make Garlic Bread Rolls from Scratch?
You might wonder, “Why spend time making garlic bread rolls when I could just grab a loaf from the store?” That’s a fair question! While store-bought options can be convenient, homemade rolls bring a touch of warmth and love that you simply can’t replicate.
- Quality Control: When you make them yourself, you choose every ingredient, ensuring freshness and quality.
- Customization: Want to add a little extra cheese? Go for it! Prefer a hint of herbs? You got it!
- Unmatched Aroma: The smell of those rolls baking in the oven is a sensory experience you don’t want to miss.
Ready to roll up your sleeves? Let’s dive into the recipe to make your very own garlic bread rolls that will impress family and friends alike.
Gather Your Ingredients
Before you jump into the kitchen, let’s make sure you have everything you need. Here’s your shopping list:
-
For the Dough:
-
3 cups all-purpose flour
-
1 packet (2 ¼ teaspoons) active dry yeast
-
1 teaspoon salt
-
1 tablespoon sugar
-
1 cup warm water (about 110°F)
-
3 tablespoons olive oil
-
For the Garlic Butter Mixture:
-
½ cup unsalted butter (softened)
-
4-5 cloves of fresh garlic (minced)
-
2 tablespoons fresh parsley (chopped, for a bit of color)
-
A pinch of salt and black pepper to taste
These ingredients are quite simple and easily found at your local grocery store or online. I usually like to grab my fresh garlic from a local farmers’ market when possible, as they tend to have stronger flavors.
The Magic of Rising Dough
Ah, the magic of yeast! This tiny organism is what gives your garlic bread rolls that pillowy texture. When you mix the yeast with warm water and a bit of sugar, watch it come to life—quite literally! This process is called proofing.
The Proofing Process
- In a small bowl, dissolve the sugar in warm water.
- Sprinkle the yeast on top and let it sit for about 5-10 minutes, until it becomes frothy. This means it’s alive and ready to work!
- While you’re waiting, you can prepare your mixing bowl by combining the flour and salt.
After the yeast has proofed, all that’s left is to combine your ingredients, knead your dough, and let it rise.
Kneading and Shaping Your Rolls
Kneading dough may seem a bit intimidating if you’re new to baking. But trust me, it’s not only therapeutic but also a great way to develop that dough’s gluten, making it nice and stretchy.
- How to Knead:
- Lightly flour your surface and your hands.
- Turn your dough out and push it down with the palm of your hand, folding it over, and repeating for about 8-10 minutes until it’s smooth and elastic.
Once kneaded, place your dough in a greased bowl, cover it with a damp cloth, and let it rise in a warm, cozy spot for about an hour or until it doubles in size.
A Little Patience Goes a Long Way
I often find myself twirling my thumbs during the waiting period, but a watched pot doesn’t boil! This rising time is crucial for your garlic bread rolls to achieve that perfect fluffiness.
While you’re waiting, think about the perfect pairing for those delicious rolls. Perhaps a fresh garden salad or a hearty soup? Want some inspiration? Check out these salads for ideas on what to serve alongside your rolls!
Ready for the Oven?
Once your dough has risen beautifully, it’s time to shape those rolls. But before you do—stay tuned for the next part, where we’ll cover the thrilling moment of baking and the divine garlic butter topping that will make your rolls shine!
If you have any other questions about garlic bread rolls or need tips along the way, feel free to drop a comment or reach out. Happy baking!
Introduction to Garlic Bread Rolls
Garlic bread rolls are not just a delicious side dish; they can truly transform your meals and elevate your cooking game. As a young professional juggling work, social life, and perhaps a Netflix binge session or two, simplicity is key in the kitchen. These rolls bring together a few pantry staples, making them both quick to prepare and irresistibly scrumptious.
Why Garlic Bread Rolls are a Game-Changer for Young Professionals
Imagine this: It’s a Tuesday evening, you’ve just come back from a long day at the office, and you want something comforting yet easy. Enter garlic bread rolls. With their warm, buttery goodness and savory garlic aroma, they can be your move from “meh” dinners to “wow” moments with minimal effort.
Benefits of Garlic Bread Rolls:
- Simplicity: They require very few ingredients. All you need is dough, garlic, butter, and a sprinkle of parsley. You can whip them up in no time!
- Versatility: Pair them with a hearty soup, a fresh salad, or even enjoy them on their own as a snack. You can even add your favorite toppings like turkey bacon or chicken ham if you’re feeling adventurous.
- Cost-Effective: Making your own rolls at home can save you money compared to ordering out or buying expensive bakery options. Plus, nothing beats the freshness of homemade bread!
Research shows that cooking at home not only saves money but also tends to be healthier compared to dining out. Check out Eat Smart for more tips on healthy home cooking.
You might wonder, “How can I make these rolls not just edible but memorable?” The key is in the garlic-butter mixture. Let your creativity flow — you can experiment with different herbs or incorporate shredded cheese for an extra cheesy delight.
Final Thoughts:
If you’ve got a busy lifestyle but still want to bring joy to your dinner table, these garlic bread rolls are the perfect solution. They’re easy to customize, fun to make, and sure to impress anyone who gathers around the table. New to baking? No problem! With this straightforward recipe, you’ll find that even novice cooks can create something truly special. Ready to get started? Let’s dive into the recipe!
Ingredients for Garlic Bread Rolls
When it comes to whipping up the perfect batch of garlic bread rolls, having the right ingredients is essential. Let’s dive into what you’ll need for this delicious recipe!
The Essentials
- All-purpose flour: About 3 to 4 cups will create the perfect dough. It’s the backbone of your rolls.
- Yeast: One packet (approximately 2¼ teaspoons) of active dry yeast will help your rolls rise and become delightfully fluffy.
- Warm water: You’ll need around 1 cup. The warmth helps activate the yeast—just make sure it’s not too hot!
- Sugar: A tablespoon of sugar nourishes the yeast and adds a hint of sweetness.
- Salt: You’ll want about 1 teaspoon to enhance the flavors.
- Garlic: Freshly minced garlic is ideal, but you can use about 2 teaspoons of garlic powder in a pinch.
- Butter: About ½ cup melted butter will make the rolls rich and tasty.
- Parsley: Fresh or dried parsley adds a lovely herbal note to finish your rolls.
These simple yet flavorful ingredients come together to create garlic bread rolls that are perfect for a cozy dinner or a casual gathering. Looking for more ideas? Check out this guide on how to make dough rise perfectly. Enjoy your baking adventure!
Crafting the Perfect Garlic Butter Mixture
To elevate your garlic bread rolls beyond the typical, you’ll want to spend some time perfecting the garlic butter. This blends seamlessly with the soft bread, ensuring every bite is bursting with flavor. Here’s what you’ll need:
- 1/2 cup unsalted butter (softened)
- 6-8 cloves of fresh garlic (minced)
- 1 tablespoon fresh parsley (chopped)
- 1 teaspoon salt (adjust based on preference)
- Optional: 1/2 teaspoon chili flakes for a bit of a kick
In a bowl, combine the softened butter, minced garlic, chopped parsley, and salt. Mix until everything is well blended. If you love a little zing, toss in those chili flakes! It’s a great way to make your garlic bread rolls stand out without overwhelming the flavor.
How to Prepare the Dough
Now that your garlic butter is ready, let’s dive into the dough-making process. The key to soft, fluffy rolls lies in how you knead and rise the dough. Here’s a straightforward method to follow:
- Combine Ingredients: In a large mixing bowl, combine 4 cups of all-purpose flour, 2 teaspoons of instant yeast, and 1 teaspoon of sugar.
- Add Liquid: Gradually incorporate 1 1/2 cups of warm water and mix until combined. For an extra depth of flavor, consider using vegetable broth instead of plain water.
- Knead: Turn the dough onto a floured surface and knead for about 8-10 minutes until it’s smooth and elastic.
- First Rise: Place the dough in a lightly greased bowl, cover it with a clean cloth or plastic wrap, and leave it to rise in a warm spot for about 1 hour, or until it doubles in size.
Did you know that using warm water can help active yeast work its charm more effectively? This is a great resource on the science behind yeast if you’re curious to learn more.
Shaping and Filling the Rolls
Once your dough has risen, it’s time to shape those garlic bread rolls! Here’s a method to ensure each roll is filled with that delicious garlic butter:
- Divide the Dough: After punching down the risen dough, divide it into 12 equal portions.
- Flatten: Take one portion and flatten it into a small disc.
- Fill: Place a generous teaspoon of the garlic butter mixture in the center.
- Seal: Carefully fold the edges of the dough over the filling and pinch to seal. Roll it into a ball shape and place it seam-side down on a greased baking sheet.
Second Rise and Baking
After shaping your garlic bread rolls, the second rise is crucial for achieving that perfect fluffy texture. Here’s what to do next:
- Allow Second Rise: Cover the rolls with a cloth again and let them rise for another 30 minutes.
- Preheat Oven: While the rolls are rising, preheat your oven to 375°F (190°C).
Bake the rolls for 20-25 minutes until they turn golden brown. Your kitchen will be filled with a heavenly aroma!
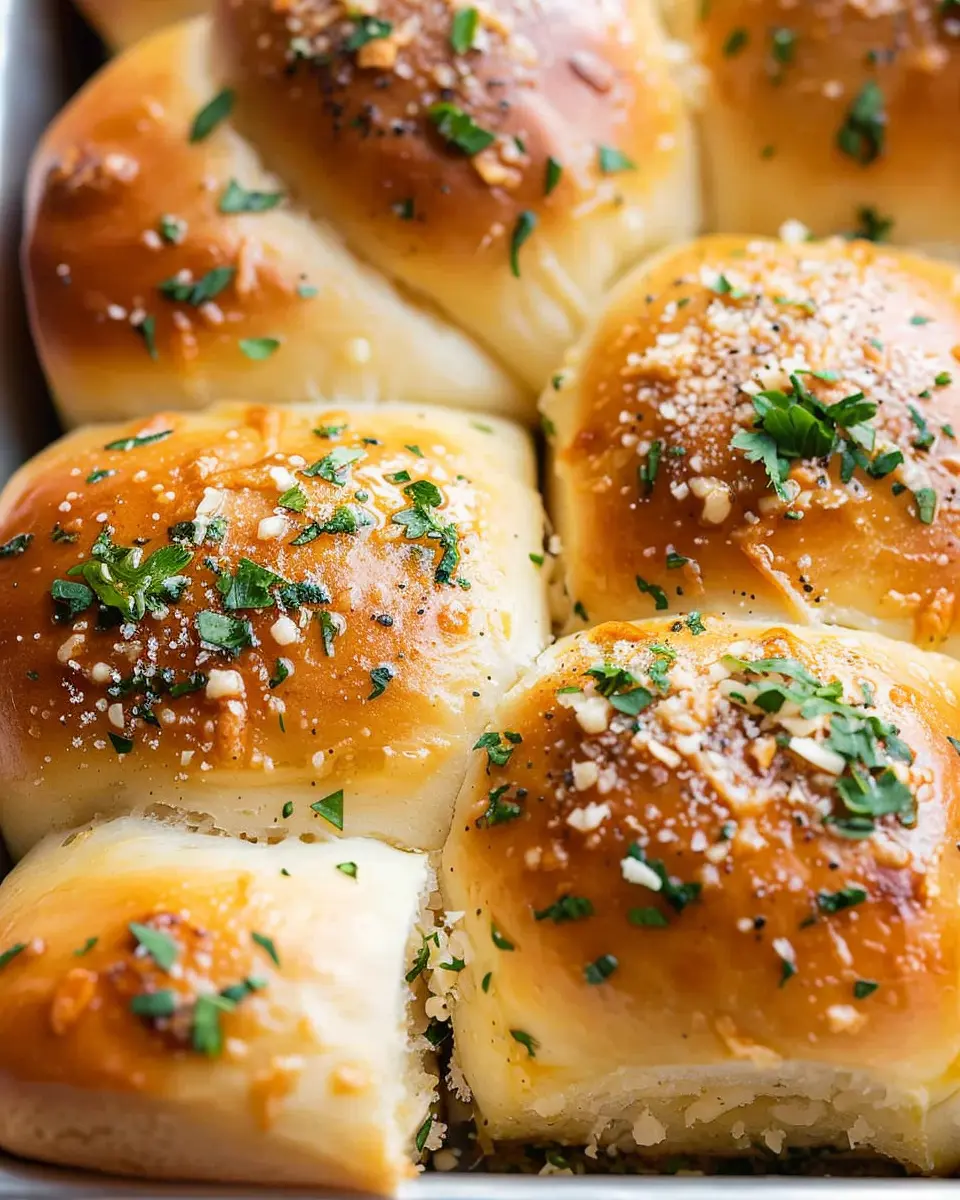
Enjoy Your Garlic Bread Rolls!
Once out of the oven, brush them with any remaining garlic butter for an extra punch of flavor. Serve warm, and watch your friends and family swoon over these mouthwatering garlic bread rolls. They make a perfect side dish for pasta, a tasty snack with soup, or just a delightful treat for any occasion.
If you want to cool any leftovers, make sure to store them in an airtight container. They reheate beautifully and can still pack a punch of flavor.
As a young professional always on the go, I bet these rolls will become your go-to recipe for easy entertaining. The best part? They’re incredibly forgiving, so don’t stress if you’re not a baking expert yet!
For more tips on baking and delicious recipes, check out sites like King Arthur Baking and Taste of Home. Happy baking!
Step-by-Step Preparation of Garlic Bread Rolls
Garlic bread rolls are the ultimate comfort food and perfect for any meal, from casual dinners to festive gatherings. Their warm, buttery flavor and aroma fill the kitchen, inviting everyone to the table. Are you ready to tackle this delicious recipe? Follow these simple steps, and you’ll be rewarded with golden-brown rolls that may just steal the show.
Gather Your Ingredients and Tools
Before diving into the cooking process, let’s organize your kitchen. Here’s what you need for your garlic bread rolls:
Ingredients:
- 3 cups all-purpose flour
- 1 packet (2 ¼ teaspoons) active dry yeast
- 1 cup warm water (about 110°F)
- ½ cup unsalted butter, softened
- 4 cloves of garlic, minced
- 1 teaspoon salt
- 1 tablespoon sugar
- 1 tablespoon chopped fresh parsley (optional)
Tools:
- Mixing bowl
- Whisk
- Baking sheet
- Parchment paper
- Rolling pin
- Clean kitchen towel
While you gather your ingredients, consider putting on some music to set the mood. Cooking is always better with a good soundtrack!
Create the Garlic Butter Mixture
The heart of your garlic bread rolls lies in the buttery garlic goodness. In a small bowl, mix the softened butter with the minced garlic. If you like a bit of flair, add some chopped parsley for extra flavor and color. Set this mixture aside—it’ll be the spread that elevates your rolls to a new level.
Mix the Dry Ingredients
In your mixing bowl, whisk together the flour, salt, sugar, and yeast. Make sure the yeast is evenly distributed; this is essential for your rolls to rise properly. The sugar will help feed the yeast, contributing to the fluffy texture we’re aiming for. For a more in-depth look at yeast and baking techniques, you can check out King Arthur Baking’s Yeast Guide.
Combine Wet Ingredients and Knead the Dough
Next, it’s time to combine your dry ingredients with the warm water and half of the garlic butter mixture you created earlier. Stir until a loose dough forms. Turn the dough onto a floured surface and knead it for about 8-10 minutes until it’s smooth and elastic. A well-kneaded dough is crucial for creating soft rolls, so don’t rush this step!
Let It Rise and Shape the Rolls
Place your kneaded dough into a lightly greased bowl and cover it with a clean kitchen towel. Allow it to rise in a warm, draft-free area for about 1-1.5 hours or until it doubles in size. Once risen, punch down the dough to release the air.
Now, shape the dough into small balls, about the size of a golf ball. Place them on a baking sheet lined with parchment paper. Make sure to leave space between them, as they will expand during baking.
Preheat the Oven and Prepare for Baking
As your rolls are rising, preheat your oven to 375°F (190°C). This ensures your garlic bread rolls will bake evenly. While waiting, you can brush the tops of your rolls with the remaining garlic butter mixture, enhancing the flavor and adding a beautiful golden hue.
Bake Your Rolls to Perfection
Once your oven is preheated, pop in your rolls and bake for 15-20 minutes or until they’re golden brown. Keep an eye on them during the last few minutes; that beautiful aroma is a good indicator they’re almost ready!
Serve with Extra Garlic Butter
Finally, let your garlic bread rolls cool slightly before serving them warm. For the perfect finishing touch, serve with an extra pat of garlic butter on the side. Feel free to add other dips or spreads, like a cheesy herb dip. Your rolls will be a hit, and they may even compete with your main course!
With these step-by-step instructions, your kitchen will soon be filled with the irresistible scent of freshly baked garlic bread rolls. Enjoy your cooking adventure!
Preparing Your Perfect Garlic Bread Rolls
Have you ever tried a dish that was so comforting, you couldn’t help but savor each bite? If you haven’t yet discovered the delightful world of garlic bread rolls, you’re in for a treat! In this section, we’ll dive deeper into the preparation process, ensuring you master every step to achieve that perfect roll. Let’s transform those simple ingredients into a dish that everyone will be asking for at the dinner table.
Ingredients You’ll Need
To make your garlic bread rolls, you’ll want to gather the following ingredients. Quality matters, so consider sourcing high-quality products whenever possible:
- 4 cups all-purpose flour, plus more for dusting
- 1 packet (2 ¼ teaspoons) active dry yeast
- 1 teaspoon sugar
- 1 teaspoon salt
- 1 cup warm water (about 110°F or 43°C)
- ¼ cup unsalted butter, melted (for mixing)
- 4 cloves of garlic, minced
- ¼ cup fresh parsley, finely chopped
- Optional: Grated cheese (like mozzarella or parmesan) for a cheesy twist
A tip for you: using fresh ingredients like minced garlic and parsley can significantly elevate the flavor. Looking for more about the benefits of fresh herbs? Check out this article.
Kneading and Rising: The Heart of Your Rolls
Now that you have your ingredients prepped, it’s time to bring it all together. Kneading is an essential step in developing the gluten that gives your garlic bread rolls their delightful texture.
- In a bowl, combine the warm water, sugar, and yeast. Let it sit for about 5-10 minutes, or until it’s frothy—this means your yeast is good to go!
- In a large bowl, mix the flour and salt. Make a well in the center and pour in the yeast mixture along with melted butter.
- Combine until you form a dough and then transfer it to a floured surface to knead for about 8-10 minutes. You’ll want your dough to be smooth and elastic.
Here’s where the patience comes in. Allow the dough to rise in a warm place, covered with a damp cloth, for about 1 hour, or until doubled in size. If you’re curious about yeast activity and rising times, read more on how the fermentation process works at The Kitchn.
Shaping and Baking Your Rolls
Once your dough has risen, it’s time to shape it into rolls! This is where the fun really begins.
- Punch down your dough lightly to release any air bubbles.
- Roll it out into a rectangle and spread that luscious garlic butter (made by mixing minced garlic and some melted butter) all over the surface.
- You can sprinkle some chopped parsley and grated cheese if you’re feeling adventurous.
- Roll up the dough tightly into a log and cut it into equal pieces (around 12 rolls).
- Place these rolls in a greased baking dish, cover, and let them rise for another 30-40 minutes.
You’re almost there! Preheat your oven to 375°F (190°C) and be ready to indulge in a smell that will awaken your senses.
Baking and Enjoying Your Creation
Once your garlic bread rolls have risen, it’s time to bake!
- Brush the tops with a little additional melted butter and bake in your preheated oven for about 20-25 minutes, or until they’re golden brown.
- When you take them out of the oven, resist the temptation to dive in right away! Let them cool for a few minutes but not too long—still warm is best.
Whether you’re serving these at a cozy dinner or just enjoying them as a snack, a little hint of butter and garlic is going to make you the hero of the evening.
Pairing Suggestions
Wondering what to serve with your beautiful garlic bread rolls? Here are a few quick ideas:
- A fresh garden salad with a tangy vinaigrette pairs beautifully.
- Turkey bacon or chicken ham sandwiches can make for an amazing filling meal.
- Or simply enjoy them alongside your favorite soup, like a hearty minestrone or classic tomato.
Each bite of these rolls will make you smile, and they’re perfect for any occasion.
This step-by-step guide to your garlic bread rolls ensures you have all the tools needed to impress your friends and family. Want to share your creations? We’d love to see how they turned out!
Don’t forget to check out our next section, where we’ll explore even more ways to customize your garlic bread rolls to suit your taste buds! Happy baking!
Variations on Garlic Bread Rolls
Garlic bread rolls are a delightful addition to any meal, but why stop at the classic version? Let’s explore some variations that can elevate your dining experience.
Cheese-Stuffed Garlic Bread Rolls
Imagine taking a bite of a garlic bread roll only to discover a gooey, cheesy center waiting for you. For this version, simply prepare your dough as you normally would, and before you shape it into rolls, add a piece of your favorite cheese, like mozzarella or cheddar, right in the middle.
- Tips for Success:
- Use a generous amount of cheese for maximum flavor.
- Ensure your rolls are well-packed to avoid leakage during baking.
This cheesy twist is perfect for dipping in marinara sauce or enjoying right out of the oven. It’s a hit at gatherings, whether you’re hosting friends or just enjoying a cozy night in.
Herb-Infused Garlic Rolls
For a fresh twist, consider herb-infused garlic rolls. This variation introduces an aromatic quality that complements the robust flavor of garlic beautifully. Simply mix finely chopped herbs like parsley, basil, or thyme into your garlic butter before slathering it on your dough.
- Flavor Combinations:
- Parsley and Parmesan: A classic combination that never disappoints.
- Basil and Mozzarella: Perfect for a summery touch.
The added herbs not only enhance the flavor but also provide a vibrant, inviting appearance that’s sure to impress. Plus, fresh herbs are known for their health benefits—did you know that basil can help reduce inflammation?
Explore these exciting variations on garlic bread rolls and take your culinary creations to the next level. If you’re looking for more fun ideas and inspiration, check out Bon Appétit’s garlic recipes for a deeper dive into the world of garlic-infused delights!
Cooking Tips and Notes for Garlic Bread Rolls
When it comes to making garlic bread rolls, a few tips can elevate your dish from good to irresistible. Here are some insights to help you get the most out of your baking experience.
Choosing the Right Bread
- Use a quality roll; a crusty Italian or French bread adds great texture.
- If you’re feeling adventurous, try making your own dough for a fresh taste.
Flavor Boosters
To take your garlic bread rolls to the next level, consider adding:
- Fresh Herbs: Basil or parsley can add a fragrant twist.
- Cheese: Incorporate mozzarella or Parmesan for a melty, creamy experience.
Baking Tips
- Preheat your oven to make sure your rolls are nice and crispy.
- For that perfect golden crust, brush the rolls with melted butter before baking.
Serving Suggestions
Pair your garlic bread rolls with a warm bowl of soup or a fresh salad. If you want to spice things up, a homemade marinara sauce is a delicious dipping option. For more on pairing ideas, check out this guide!
With these tips, your garlic bread rolls will be the hit of any meal. Enjoy the process and feel free to experiment!
Serving Suggestions for Garlic Bread Rolls
Garlic bread rolls are a delightful addition to many meals, offering that irresistible warm, buttery taste we all love. Their versatility makes them perfect for various occasions, from simple weeknight dinners to elaborate holiday feasts.
Pairing with Soups and Salads
These delicious rolls lend themselves wonderfully to soups and salads. Try serving them alongside a rich minestrone soup or a fresh garden salad with homemade vinaigrette. Soak up the delightful broth or enjoy a bite of the crispy roll with a refreshing salad.
Sandwich Alternatives
Feeling adventurous? Use garlic bread rolls as a base for sandwiches. Layer in some turkey bacon, fresh greens, and a dash of spicy mayo for a tasty twist. You could also experiment with chicken ham and avocado for a creamy, savory delight. Your lunch game will never be the same!
Make It a Snack
Need a munching option? Slice your garlic bread rolls in half, spread a bit of cream cheese or garlic herb butter, and top with fresh herbs. This creates a quick snack that’s great for entertaining or indulging during a movie night.
For some additional inspiration on using garlic-infused flavors, check out this guide on garlic. With so many ways to enjoy them, you’ll never tire of these mouthwatering rolls!
Bringing Your Garlic Bread Rolls to Life
With the dough mixed and risen to perfection, you are now on the brink of creating something truly delightful: homemade garlic bread rolls. It’s the moment when all the ingredients meld beautifully—aromas wafting through your kitchen, and anticipation buzzing in the air. Let’s dive into the methods that will take your rolls from good to absolutely irresistible.
The Final Touch: Preparing Your Garlic Bread Rolls
While your dough is resting, you might be wondering how to maximize flavors. Here’s where your creative flair can shine. Think about infusing additional herbs like parsley or oregano into your garlic spread. It’s these little choices that elevate your simple rolls into a gourmet experience.
Steps to Assemble Your Rolls
- Preheat Your Oven: Set it to around 375°F (190°C) to ensure it’s hot enough for that crispy crust.
- Shape the Dough: After the dough has risen, punch it down gently and roll it into small balls—about the size of a golf ball.
- Make the Garlic Spread: Combine softened butter, minced garlic, and any additional herbs you like in a bowl. Mix until smooth.
- Coat the Rolls: Dip each dough ball in the garlic spread, ensuring they are generously coated.
- Arrange on Baking Sheet: Place them on a lined baking sheet, making sure to keep a little space between each roll as they will expand while baking.
Baking and Serving
Now comes the moment of truth: baking your garlic bread rolls. Keep a close eye on them; you want a golden-brown finish that promises a perfect crunch.
- Bake for 20–25 minutes until they’re golden on top.
- Brush with Additional Garlic Butter: For added flavor, brush the rolls one more time with any leftover garlic butter right after you take them out of the oven.
Pairing Recommendations for Your Garlic Bread Rolls
What to serve with these tasty rolls? Consider trying them alongside a simple chicken salad, creamy soups, or savory pasta dishes. And hey, if you’re looking to explore beyond the traditional, turkey bacon or chicken ham work wonders as side options too.
Wine Alternatives
Looking for a beverage to accompany your meal while steering clear of wine? A chilled sparkling water with a slice of lemon or a refreshing iced tea pairs beautifully with garlic bread rolls. The fizz and acidity of these drinks complement the rich flavors of the rolls and any accompanying dishes.
Storing and Reheating Tips
If you manage to have leftovers (which might be tricky!), here’s how to store them:
- In an Airtight Container: Your garlic bread rolls will keep well for about 2–3 days.
- Reheating: Warm them in an oven at 350°F (175°C) for about 5–10 minutes to regain that fresh-baked goodness.
A little pro tip: you can also freeze your rolls before baking for a ready-to-go treat on a busy weeknight. Just thaw them out, let them rise, and bake as usual!
Conclusion
Making garlic bread rolls can be both a fun culinary project and a wonderful way to impress your friends or family. With their warm, buttery flavor and inviting aroma, they’re hard to resist. So go ahead—give them a try and let your taste buds experience a little piece of heaven right at home!
For more insights and delightful recipes, check out Serious Eats for tips on ingredient substitutions, cooking techniques, and much more. Happy baking!
Time Breakdown for Garlic Bread Rolls
Preparation Time
Making garlic bread rolls is straightforward! You’ll spend about 15 to 20 minutes prepping the dough and garlic mixture. This includes measuring ingredients, mixing, and rolling the dough into delightful, savory rolls. If you’re short on time, you can prepare the garlic butter mixture ahead and store it in the fridge.
Cooking Time
Baking your garlic bread rolls will take approximately 20 to 25 minutes. The aroma wafting through your kitchen will be irresistible, promising a delightful snack or side dish.
Total Time
In total, you’re looking at around 40 to 45 minutes from start to finish. Considering the deliciousness that awaits, it’s a small time investment! If you’re serving these at a gathering, they’ll certainly impress your friends and family. For tips on making the rolls even more scrumptious, check out this article on mastering garlic flavors.
Nutritional Facts for Garlic Bread Rolls
Garlic bread rolls are as delicious as they are satisfying, but it’s also important to consider their nutritional value. Understanding what’s in your food can help you make better choices!
Calories
In a serving of garlic bread rolls, you’ll typically find around 150-200 calories, depending on your recipe variations. Be mindful of portion sizes; it’s easy to indulge when they’re warm and buttery!
Carbohydrates
These rolls usually contain about 25-30 grams of carbohydrates. Carbs provide energy, making them a great side dish for any meal. To keep things balanced, pair them with a protein-rich option, such as grilled chicken or a hearty salad.
Protein
While garlic bread rolls aren’t protein powerhouses, they do contain around 4-6 grams per roll. For a more substantial meal, you could add a side of turkey bacon or grilled veggies, which can boost your protein intake!
For more detailed nutritional facts, check out the USDA FoodData Central for comprehensive information on ingredients. Remember, the key to enjoying treats like garlic bread rolls is moderation and balance!
Elevate Your Garlic Bread Rolls: The Perfect Pairings
Now that you’ve crafted those delicious garlic bread rolls, let’s take a moment to talk about how to elevate this delightful dish. The great thing about garlic bread rolls is their versatility—they can be paired with an array of meals that complement their buttery, garlicky goodness.
Ideas for Delicious Pairings
Whether you’re planning a cozy night in or a festive gathering with friends, here are some ideas to make your garlic bread rolls shine!
-
Hearty Soups: Picture a steaming bowl of minestrone or tomato basil soup. The warmth and acidity of these soups pair beautifully with your rolls, making for a comforting meal.
-
Salads: A crisp Caesar salad or a simple arugula salad drizzled with lemon vinaigrette can provide the perfect contrast to the rich flavors of the rolls. The freshness of these salads will keep your meal light and balanced.
-
Chili or Stews: If you’re making a hearty beef chili or a rich vegetable stew, these rolls can serve as the perfect sidekick. The rolls can soak up all that flavor, ensuring no drop goes wasted.
-
Grilled Meats: Serve your garlic bread rolls alongside some grilled chicken ham or turkey bacon for a flavorful feast. The smoky notes of the grilled meats enhance the delightful garlic flavor.
-
Cheese Boards: Host an impromptu gathering and serve the rolls as part of a cheese board. Pair them with soft cheeses like brie or sharp choices like aged cheddar for a delightful experience.
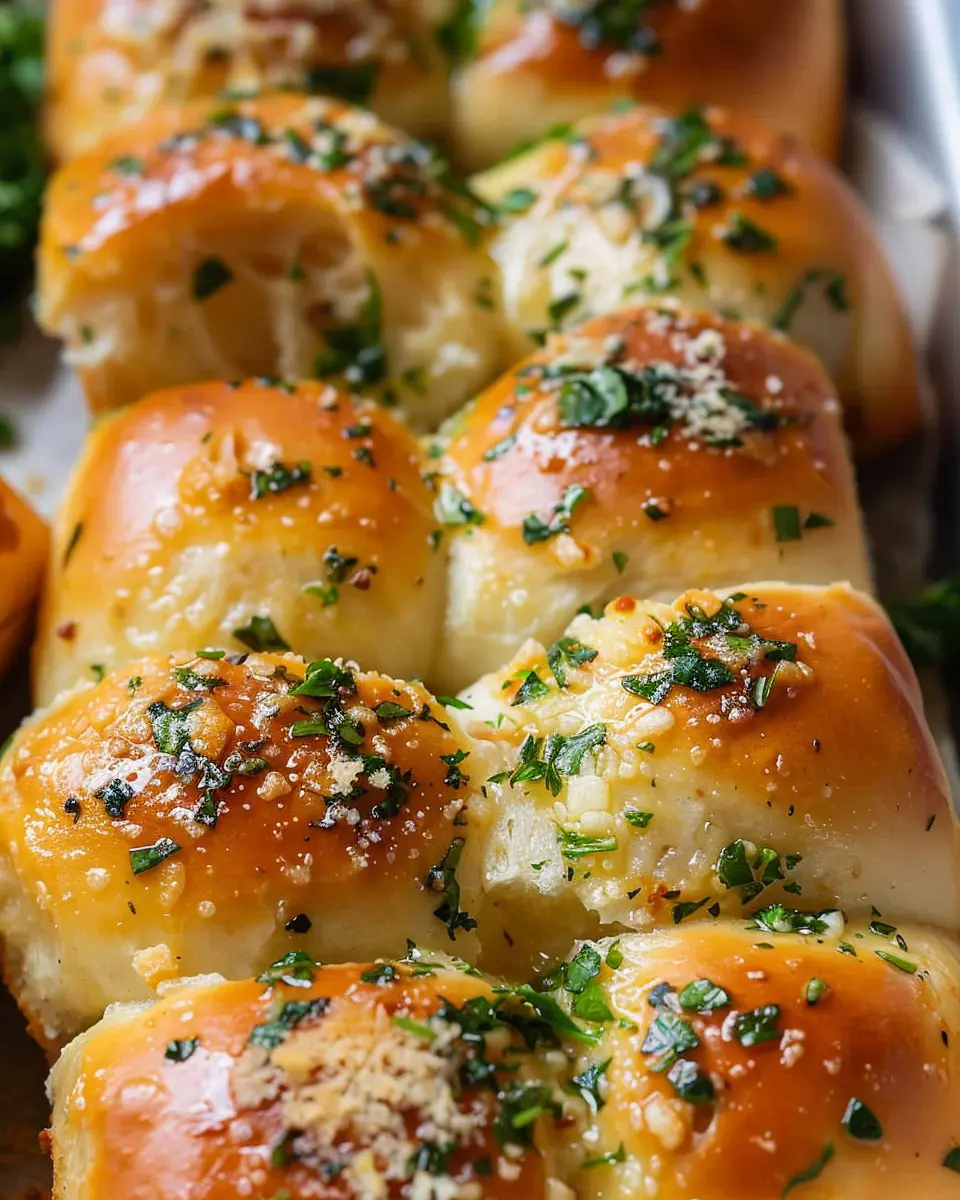
Why You’ll Love These Rolls
There’s something about the aroma of freshly baked garlic bread rolls that fills your home with warmth and coziness. But it’s not just the smell—each bite is a doughy explosion of flavor that makes you appreciate the art of cooking from scratch.
Did you know that a survey by the Culinary Institute of America found that nearly 70% of people prefer freshly baked bread over store-bought options? It’s no wonder that homemade rolls are often a hit among friends and family.
Making Ahead and Storing Tips
If you’re planning your meal ahead of time, you might wonder how to best store these delightful rolls. Here are some tips:
-
Make Ahead: You can shape the rolls and place them in the refrigerator. Just remember to let them rise before baking—this creates that fluffy texture we all love.
-
Freezing: If you want to prepare the rolls well in advance, you can freeze them after shaping. Just bake straight from the freezer; no need to thaw!
-
Storage: Keep any leftover rolls in an airtight container at room temperature for up to two days or in the fridge for about a week. Just pop them in the oven for a few minutes to revive that fresh-baked flavor.
Bringing It All Together
Ultimately, the convenience and comfort of garlic bread rolls allow them to adapt to any occasion. Whether it’s a grand dinner party or a casual weeknight meal, they can elevate your dining experience.
If you’re enjoying your rolls with friends, consider making a night of it! Set up a roll-making evening where everyone can pitch in, sharing stories while you bake. There’s something truly special about cooking together, and the aroma of those rolls will surely spark joy.
For more inspiration on creative pairings, check out resources like The Kitchn or Bon Appétit for innovative dishes that could complement your rolls beautifully.
So, are you ready to dive into this delightful culinary adventure? Your garlic bread rolls await!
FAQs about Garlic Bread Rolls
How can I make garlic bread rolls without yeast?
If you’re short on yeast or simply prefer a quicker method, you can whip up garlic bread rolls using baking powder as a leavening agent. Combine all-purpose flour, baking powder, salt, and your favorite herbs in a bowl, then mix in yogurt or buttermilk to form a dough. Shape the rolls and generously apply your garlic butter topping before baking until golden brown. It’s remarkably simple, and you still get that delicious garlic flavor!
Can I freeze garlic bread rolls?
Absolutely! Freezing garlic bread rolls is a great way to have them on hand whenever those cravings hit. After baking, let the rolls cool completely. Then, wrap them tightly in plastic wrap or aluminum foil and place them in a freezer-safe bag. When you’re ready to enjoy them, just pop them in the oven at a low temperature until warmed through. For more tips on freezing bread, check out this guide on freezing baked goods from King Arthur.
What can I serve with garlic bread rolls?
Garlic bread rolls pair wonderfully with a variety of dishes. Consider serving them alongside a fresh salad, a hearty bowl of soup, or even as a delightful side with pasta dishes like spaghetti or fettuccine. They’re also fantastic for soaking up sauces! For a fun twist, try them with a platter of roasted vegetables or as part of a charcuterie board with chicken ham and turkey bacon!
With these tips and tricks, you’ll be a garlic bread rolls pro in no time, ready to impress your friends and family!
Conclusion on Garlic Bread Rolls
Garlic bread rolls are more than just a side dish; they elevate any meal to a new level of comfort and satisfaction. Whether you’re enjoying them alongside a warm bowl of soup or serving them at your next gathering, these rolls are sure to impress. The combination of fresh garlic, butter, and herbs creates an irresistible aroma that will have everyone coming back for seconds.
If you haven’t tried making garlic bread rolls yet, I highly recommend giving this simple yet delightful recipe a go. You’ll not only delight your taste buds but also impress your friends and family. So, what are you waiting for? Grab your ingredients and get baking! For more culinary inspiration, check out Serious Eats for delicious ideas.
PrintGarlic Bread Rolls: The Best Homemade Delights You’ll Love
Discover how to make the best homemade garlic bread rolls that everyone will love. Perfect for any occasion!
- Prep Time: 15 minutes
- Cook Time: 20 minutes
- Total Time: 1 hour 35 minutes
- Yield: 12 rolls 1x
- Category: Bread
- Method: Baking
- Cuisine: American
- Diet: Vegetarian
Ingredients
- 3 cups all-purpose flour
- 1 packet instant yeast
- 1 tablespoon sugar
- 1 teaspoon salt
- 1 cup warm water
- 4 cloves garlic, minced
- 1/4 cup unsalted butter, melted
- 1/4 cup fresh parsley, chopped
Instructions
- In a bowl, mix warm water, sugar, and yeast. Let it sit for 5 minutes until frothy.
- Add flour, salt, garlic, and melted butter. Mix until a dough forms.
- Knead the dough on a floured surface for 5 minutes until smooth.
- Place in a greased bowl, cover, and let rise for 1 hour.
- Preheat oven to 375°F (190°C).
- Punch down the dough and shape into rolls.
- Place rolls on a baking sheet, cover, and let rise for another 30 minutes.
- Bake for 15-20 minutes until golden brown.
- Brush with melted butter and sprinkle with parsley before serving.
Notes
- For extra flavor, add grated cheese to the rolls before baking.
- These rolls are best served warm.
Nutrition
- Serving Size: 1 roll
- Calories: 150
- Sugar: 1g
- Sodium: 200mg
- Fat: 8g
- Saturated Fat: 5g
- Unsaturated Fat: 3g
- Trans Fat: 0g
- Carbohydrates: 17g
- Fiber: 1g
- Protein: 4g
- Cholesterol: 15mg
Keywords: Garlic Bread Rolls, Homemade Garlic Rolls, Easy Garlic Rolls