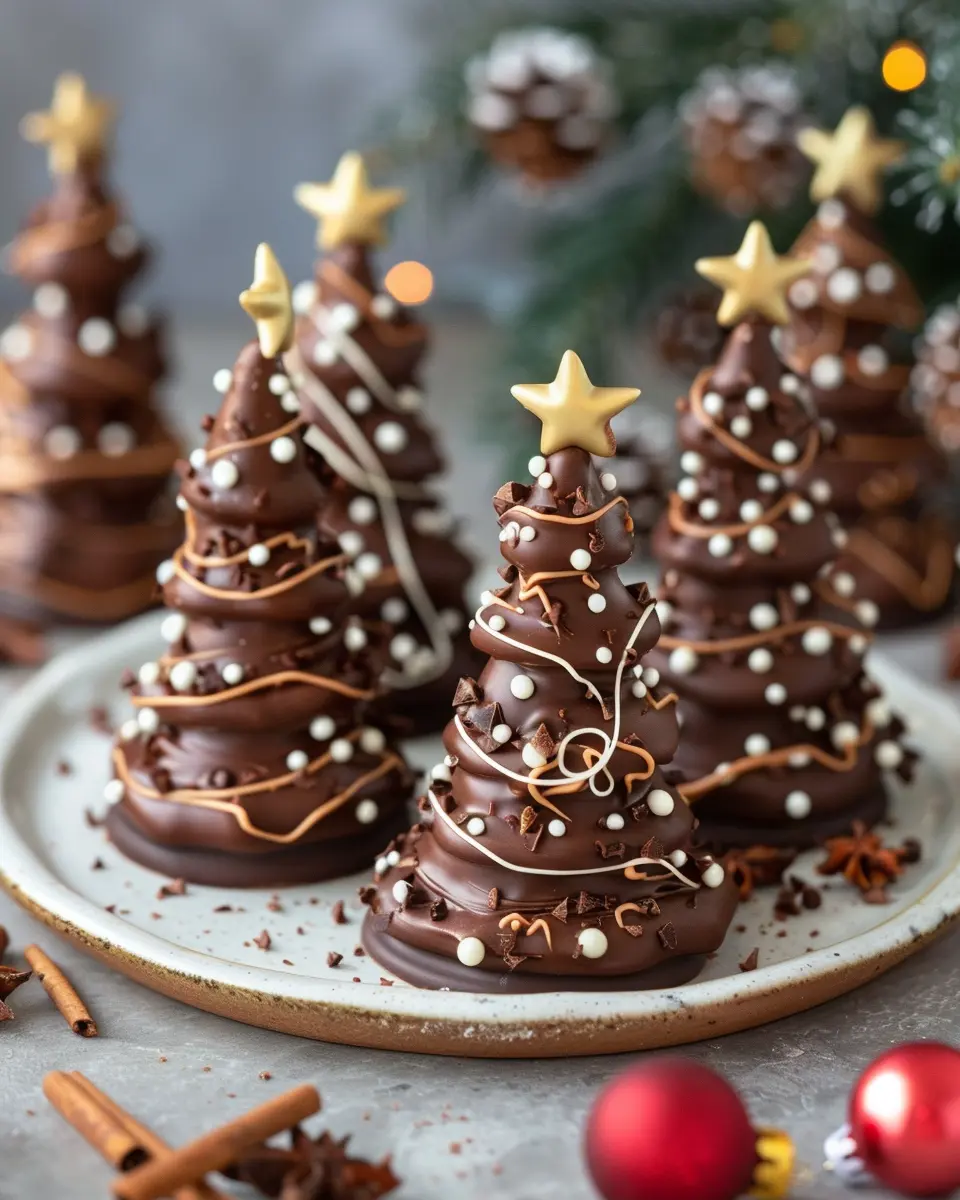
Introduction to Christmas Chocolate Trees Recipe
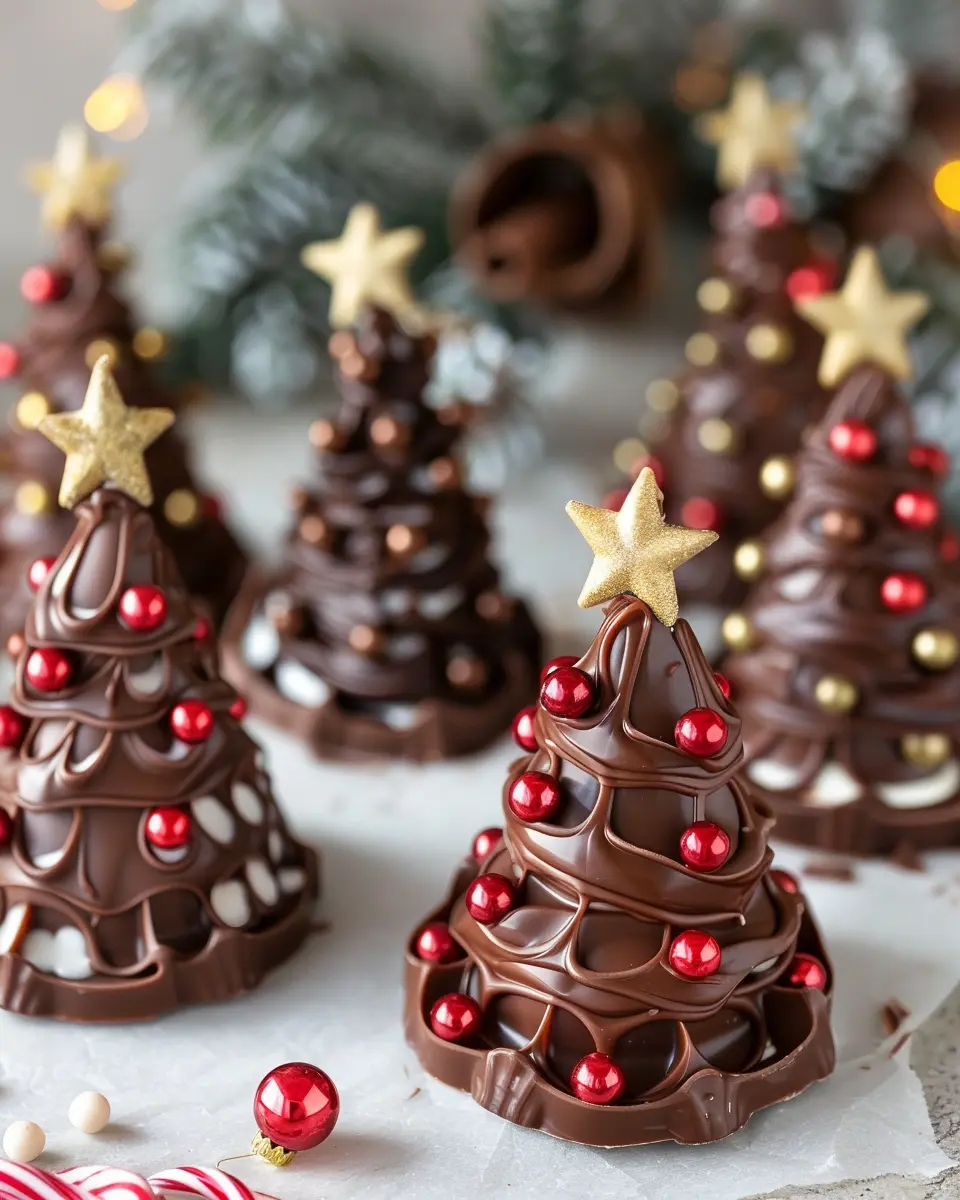
When the holiday season rolls around, we all start looking for those special treats that not only taste good but also look delightful. Enter Christmas Chocolate Trees! They embody the spirit of the season with their whimsical shape and rich flavor. Not to mention—who can resist a dessert that doubles as a festive decoration?
Why Christmas Chocolate Trees are a festive favorite
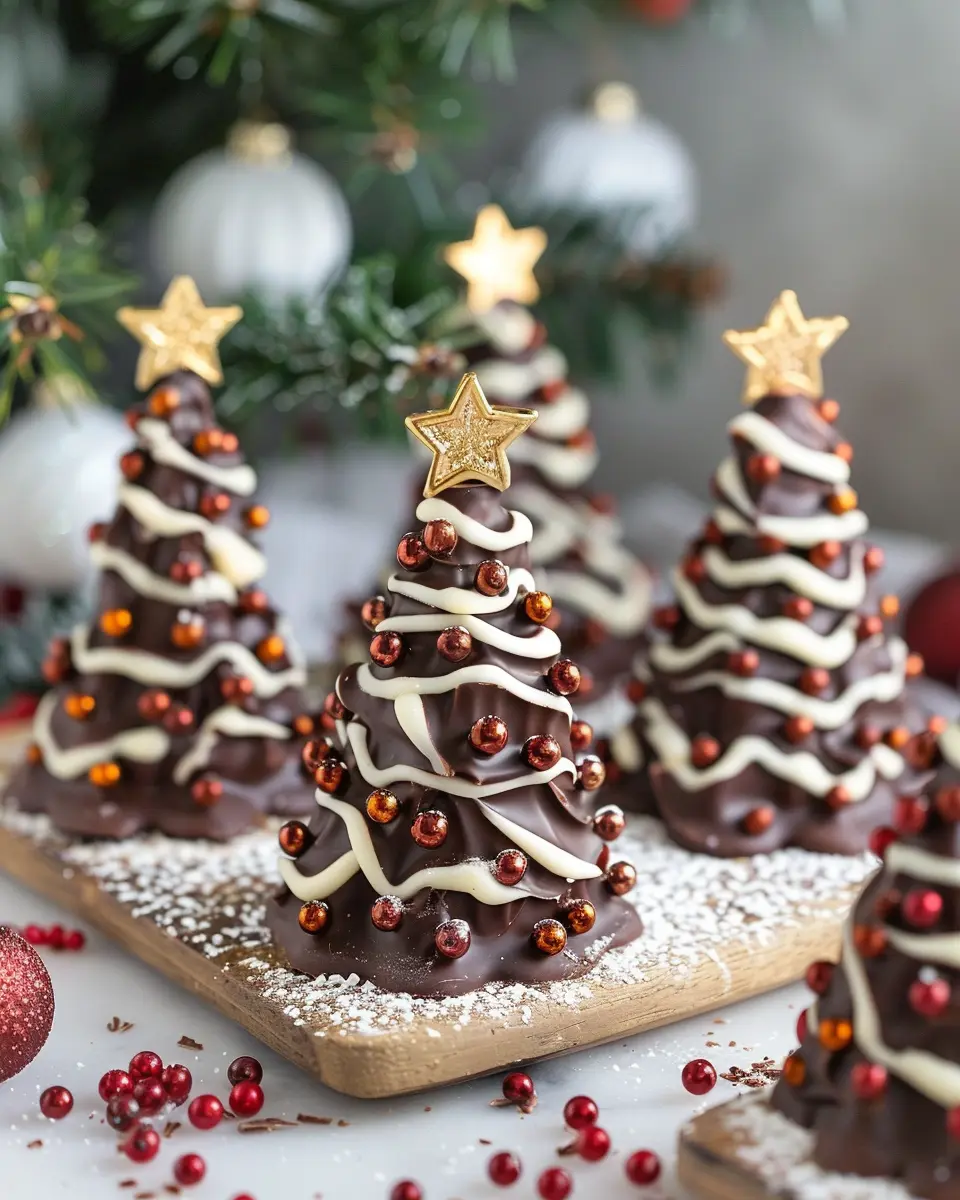
If you’re like me, the holidays are a time for creativity in the kitchen. These chocolate trees are a straightforward yet stunning way to impress your friends and family during holiday gatherings. Picture this: a table adorned with a variety of festive treats, and your self-made chocolate trees stealing the spotlight! They are not just visually appealing but also incredibly versatile. You can customize them with different toppings like crushed candy canes, sprinkles, or even mini marshmallows, allowing you to create a unique touch that reflects your personality.
Delving into the world of Christmas treats, chocolate has a special place. According to the National Confectioners Association, about 90% of Americans will indulge in chocolate during this festive season. It’s a beloved ingredient that brings people together, evoking feelings of joy and nostalgia. The rich aroma and smooth texture of chocolate create the perfect comfort food, especially during the colder months. Plus, making these trees can be a fun activity to share with friends or family—perfect for holiday bonding moments.
You might be wondering how to make these beautiful chocolate creations without complicated techniques. That’s the beauty of this Christmas Chocolate Trees Recipe. It’s remarkably easy, using simple ingredients that you likely already have in your pantry. You can even make them with your kids for some festive family fun.
As we dive deeper into the recipe, you’ll discover that crafting these chocolate masterpieces is not only rewarding but also a delightful way to share joy and kindness during the holiday season. So, let’s get started on making your own Christmas Chocolate Trees and ensure they’re the highlight of your festive spread!
For tips on creating a cozy holiday atmosphere while baking, check out this guide filled with suggestions on making your kitchen a festive space!
Ingredients for Christmas Chocolate Trees
Creating delightful Christmas Chocolate Trees is a fun way to bring some festive cheer to your holiday festivities. Whether you’re intending to impress guests or just treat yourself, having the right ingredients is key.
Essential ingredients for your chocolate trees
To craft your delicious chocolate trees, you’ll need the following essentials:
- Chocolate: Choose high-quality milk or dark chocolate for a richer flavor.
- Piping Bags: These are essential for creating those intricate tree designs!
- Green Food Coloring: A little green goes a long way! This will turn your chocolate into a vibrant tree color.
- Edible Decorations: Think sprinkles, edible glitter, or mini chocolate ornaments to take your trees to the next level.
These ingredients are simple but can make a big impact on the final product!
Optional ingredients for personalization
Want to get creative? Here are some optional ingredients to personalize your Christmas Chocolate Trees Recipe:
- Different Flavors: Consider adding peppermint extract or orange zest for a unique twist.
- Crunchy Elements: Finely crushed nuts or candy canes can add texture.
- Chocolate Drizzle: A different chocolate color can create beautiful accents.
Feel free to mix and match these! Not only will you satisfy your holiday sweet tooth, but you’ll also impress friends and family with your creativity. For more ideas on edible decorations, check out Wilton’s guide on cake decorating techniques. This way, you can explore even more festive options.
Preparing Christmas Chocolate Trees
Creating festive treats like Christmas Chocolate Trees is not just about delightful flavors but also about rekindling that childlike wonder during the holiday season. With a few simple steps, you can transform ordinary chocolate into eye-catching, delicious decorations that will impress your friends and family. Follow along as we prepare these delightful treats; you might even want to make them a new holiday tradition!
Gather your supplies
Before diving into the melting and molding, it’s important to gather all the necessary supplies for your Christmas Chocolate Trees Recipe. Here’s what you’ll need:
- Dark chocolate (about 12 ounces)
- White chocolate (for drizzle)
- Tree-shaped silicone molds (available at many kitchen supply stores or online)
- Parchment paper
- Non-stick cooking spray
- Assorted sprinkles (think edible glitter, colorful nonpareils, or festive confetti)
- A microwave-safe bowl or double boiler
- A piping bag or zip-top bag for drizzling
Once you have everything in front of you, you can easily shuffle through each step without feeling rushed or frantic.
Melt the dark chocolate
Now comes the fun part! Melting chocolate is not only satisfying to watch but is essential for molding your trees. For the best results, opt for high-quality dark chocolate; it provides a rich, robust flavor that balances well with the sweet toppings you’ll add later.
- Chop the chocolate: Finely chop your dark chocolate into small, even pieces. This ensures it melts uniformly.
- Choose your method: You can either use a microwave or a double boiler. If using a microwave, start with 30-second intervals, stirring in between stops until it’s fully melted. If you choose the double boiler route, fill a pot with a couple of inches of water, bring it to a gentle simmer, and place your chocolate in a bowl over the pot, stirring until smooth.
- Check the temperature: Always be vigilant with your chocolate. If it gets too hot, it can seize and become unusable. Aim for about 120°F (49°C).
Create the chocolate tree shapes
With your melted chocolate ready, it’s time to craft those beautiful tree shapes. This step requires just a bit of patience — not too much, though!
- Prepare your mold: Lightly spray the silicone molds with non-stick cooking spray. This helps ensure your trees pop right out with no hassle later.
- Pour in the chocolate: Carefully use a spoon or a piping bag to fill each mold cavity with melted dark chocolate. Be kind and make sure to tap the mold gently on the counter to remove any air bubbles.
- Level off the tops: Allow a bit of chocolate to overflow so you can scrape off the excess later, ensuring a smooth finish.
Drizzle white chocolate for a snowy finish
Want to elevate your Christmas Chocolate Trees? The snowy drip effect is both beautiful and delicious:
- Melt the white chocolate: Repeat the melting process with your white chocolate.
- Drizzle: Once your dark chocolate trees have partially set (but are still pliable), pour the melted white chocolate into the piping bag and carefully drizzle it over the trees to resemble snow. The whimsical pattern adds a lovely contrast to your dark chocolate.
Add sprinkles and let them set
Now, let’s add the finishing touches!
- Sprinkle away: While the white chocolate is still soft, sprinkle on your festive toppings. Let your imagination run wild — colorful nonpareils, edible glitter, or even crushed candy canes can add a beautiful holiday flair.
- Setting time: Place your molds in the refrigerator for at least 30 minutes or until completely set. This step ensures that every bite of your Christmas Chocolate Trees is perfectly shaped and snap-worthy.
Now that you have completed your Christmas Chocolate Trees, gather friends and family to enjoy this festive confection. These trees not only make delightful desserts but can also serve as charming decorations. Sharing stories while decorating adds another layer to your culinary celebration – who wouldn’t enjoy that during the holidays?
Each step is an opportunity for creativity, so dive in and enjoy the process! If you’re looking for more delightful holiday recipes, consider browsing this collection of festive treats for inspiration!
Variations on Christmas Chocolate Trees
Dark Chocolate vs. Milk Chocolate Trees
When it comes to the delightful world of Christmas Chocolate Trees, the choice between dark and milk chocolate can be a game changer. Dark chocolate brings a rich, bold flavor that pairs wonderfully with sweet toppings such as caramel or candied fruits, making these trees an excellent choice for those who appreciate a more complex taste profile. On the other hand, milk chocolate tends to be creamier and sweeter, which is perfect for creating a playful and festive tree.
If you’re unsure which to choose, why not indulge in a mix of both? Layering them creates a stunning visual and taste experience that can impress your guests. Plus, dark chocolate boasts antioxidants, which adds a hint of guilt-free enjoyment to your holiday treats (Healthline has insightful details on that!).
Fun Toppings and Decorations
The fun doesn’t stop at chocolate! Your Christmas Chocolate Trees Recipe truly shines with unique toppings. Here are some ideas to get your creative juices flowing:
- Edible Glitter or Sprinkles: These add a whimsical touch and shimmer.
- Mini Candy Canes: Perfect for a festive crunch!
- Dried Fruits: Consider cranberries or apricots for a pop of color and natural sweetness.
- Nuts: Chopped walnuts or almonds add texture and flavor contrast.
Don’t forget to let your imagination run wild! Maybe you’ve got a favorite childhood snack you want to incorporate? And if you’re looking for more inspirations or tips, SweetTree has some fantastic ideas for dessert decor that will elevate your chocolate trees to the next level.
Whether for a holiday party or a cozy night in with loved ones, customizing your Christmas Chocolate Trees makes them even more special—and who wouldn’t want to share a bit of creativity this season?
Baking notes for Christmas Chocolate Trees
Tips for working with chocolate
When making your Christmas Chocolate Trees, the key to success is proper chocolate handling. Always temper your chocolate to ensure a glossy finish and that satisfying snap. Use a microwave or double boiler, and avoid overheating. An instant-read thermometer is handy; aim for about 88°F for dark chocolate and slightly lower for milk and white chocolates. For a fun twist, mix in some crushed peppermint candies while melting your chocolate for added flavor and festivity.
Suggestions for edible gifts or decorations
These delightful Christmas Chocolate Trees make fantastic edible gifts! Present them in a decorative box or on a festive platter—perfect for holiday parties. You can also attach a personalized note for a thoughtful touch. Consider making smaller versions to hang as ornaments on your tree, adding that homemade charm. If you’re looking for more creative decoration ideas, check out sites like Martha Stewart or BBC Good Food for additional inspiration on festive sweets.
With these tips, your Christmas Chocolate Trees will not only look stunning but taste amazing, making your holiday gatherings even more memorable!
Serving suggestions for Christmas Chocolate Trees
Creating a delightful presentation for your Christmas Chocolate Trees Recipe can elevate any holiday gathering. Here are some creative ways to present these festive treats that will surely impress your guests.
Creative ways to present your chocolate trees
-
On a Festive Platter: Arrange a series of chocolate trees of various sizes on a beautifully decorated platter. Add some colorful candies or edible glitter around them to mimic a winter wonderland.
-
Tree Trunk Display: Use a wooden board or a faux log to resemble a tree trunk. Stack your chocolate trees atop, encouraging guests to “pick” their favorites as if they were in a forest.
-
In Individual Boxes: For a personal touch, wrap each chocolate tree in clear cellophane and tie it with a ribbon. This not only makes for a charming gift but also allows guests to take a piece of your creativity home.
-
Pair with Edibles: Serve alongside fresh fruits like strawberries or festive marshmallows for a contrasting texture and flavor. A small cup of hot cocoa can be a warming drink to enjoy with these treats.
Feel free to explore various serving options that reflect your holiday theme, and don’t forget to involve your friends in the decorating process. Sharing this sweet experience makes the season even merrier! If you’re looking for more inspiration, check out these fantastic ideas on Food Network.
Tips for making perfect Christmas Chocolate Trees
How to prevent chocolate from seizing
One of the biggest challenges when working with chocolate is the dreaded seizing. This occurs when moisture or steam gets into your chocolate, causing it to clump and become unusable. Here are some tips to keep your chocolate silky smooth:
- Keep it dry: Make sure all your utensils and surfaces are completely dry before you start. Even a tiny drop of water can ruin your chocolate.
- Avoid steam: When melting chocolate, don’t use a microwave if your bowl isn’t microwave-safe. Instead, opt for a double boiler setup to gently melt your chocolate over simmering water.
- Choose quality chocolate: Higher quality chocolate tends to have fewer additives, making it less likely to seize.
For more detailed guidance on chocolate techniques, check out this resource from the Chocolate Manufacturers Association.
Best practices for melting chocolate
Getting the melting process right is essential for making delightful Christmas Chocolate Trees. Here are some best practices to ensure you succeed:
- Use low heat: Whether you’re using a microwave or stove, keep the heat low. Chocolate retains its shape even when melted, so stir it often to prevent overheating.
- Opt for small batches: If you’re working with colored chocolate or have various flavors, melting small amounts at a time can help you control the texture and avoid waste.
- Cooling gradually: Once melted, allow the chocolate to cool slightly before molding. This will give your chocolate a nice sheen and help it to harden more effectively.
With these tips in mind, you’re one step closer to perfecting your Christmas Chocolate Trees Recipe! Happy decorating!
Time Details for Christmas Chocolate Trees
Preparation Time
Getting started on your Christmas Chocolate Trees Recipe is quick and simple! You’ll need about 20 minutes to gather your ingredients, melt the chocolate, and shape your trees. Make sure to have everything ready to go so the melting process is as smooth as possible.
Setting Time
Once you’ve crafted your delightful chocolate creations, they’ll need some time to set. Place them in the refrigerator for at least 30 minutes. This gives the chocolate a chance to harden beautifully, making your trees sturdy and ready for decoration.
Total Time
In total, you’re looking at around 50 minutes from start to finish. That’s not too long for a festive treat that impresses! The best part? You can prepare these delicious chocolate trees ahead of time for your holiday gatherings.
For more sweet inspiration, check out this guide to Christmas desserts for more ideas that pair well with your homemade delights.
Nutritional Information for Christmas Chocolate Trees
When it comes to festive treats, our Christmas Chocolate Trees Recipe offers a delightful blend of enjoyment and nutrition. Let’s break down what you can expect with these sweet, holiday-inspired delights.
Calories Per Serving
Each serving of these charming chocolate trees contains around 150 calories. It’s important to enjoy them in moderation, especially during the festive season when it’s easy to indulge.
Sugar Content
Our Christmas Chocolate Trees boast a sugar content of approximately 10 grams per serving. While they are sweet, consider balancing your consumption with healthier snacks throughout the day. You can find more insights on sugar consumption from the American Heart Association.
Helpful Ingredient Breakdown
- Dark Chocolate: Rich in antioxidants, providing health benefits with each bite.
- Coconut Flakes: Adds a delightful texture and is a source of healthy fats.
- Special Sprinkles: While fun, opt for natural sprinkles to keep your treat healthier.
By understanding the nutritional elements of our Christmas Chocolate Trees Recipe, you can make informed choices while still enjoying the festive spirit. Happy baking!
FAQs about Christmas Chocolate Trees
Can I use different chocolates?
Absolutely! One of the beauties of this Christmas Chocolate Trees Recipe is its versatility. You can experiment with various types of chocolate—milk, dark, or white chocolate all work wonderfully. If you love the rich taste of dark chocolate, go ahead and use that for a more intense flavor. Want to mix things up? Consider incorporating flavored chocolates like peppermint or mocha for an extra festive touch. Just melt them down and follow the same steps to create your edible trees!
How long do these chocolate trees last?
Once completed, your delightful chocolate trees can last up to two weeks if stored properly. Keep them in an airtight container to maintain their freshness. For added protection, you can place parchment paper between layers of trees to prevent them from sticking together. If you want to stack them on a plate, consider placing them in a cool, dry place away from direct sunlight. For long-term storage, you can even freeze them! Just make sure to wrap them tightly in plastic wrap before placing them in the freezer.
Can kids help with this recipe?
Definitely! Making Christmas Chocolate Trees is a joyous and creative activity that kids will love. They can help with melting the chocolate, drizzling it over the cones, and decorating with sprinkles. This recipe not only promotes fine motor skills as they pour and sprinkle but also fosters holiday spirit and family bonding. Just supervise closely to ensure safety during the melting process. For additional fun, consider checking out some tips on involving kids in kitchen activities from reputable sources like the American Academy of Pediatrics.
Embrace the holiday spirit and gather everyone around to create these charming treats!
Conclusion on Christmas Chocolate Trees
Final thoughts on festive chocolate creations
As we wrap up this delightful journey into our Christmas Chocolate Trees Recipe, it’s clear that these festive treats are more than just sweets—they’re a way to bring joy and creativity into your holiday celebrations. Making these chocolate trees can become a cherished family tradition, allowing everyone to unleash their imagination.
Remember, the beauty of these treats lies in their versatility. You can use your favorite chocolates and decorations, making each tree a unique expression of your holiday spirit. Whether you’re enjoying them with friends or gifting them to loved ones, they’re sure to spark warm smiles. Ready to spread the cheer this season? Check out resources like The Joy of Baking for more fun ideas to complement your festive chocolate artistry!
PrintChristmas Chocolate Trees Recipe: Easy and Festive Delight for All
Make your holidays sweeter with these delightful Christmas Chocolate Trees!
- Prep Time: 20 minutes
- Cook Time: 10 minutes
- Total Time: 30 minutes
- Yield: 8 servings 1x
- Category: Dessert
- Method: No-Bake
- Cuisine: American
- Diet: Vegetarian
Ingredients
- 200 grams dark chocolate
- 100 grams green candy melts
- 50 grams mini marshmallows
- 50 grams edible glitter
- 1 cone-shaped mold
- 1 baking sheet
Instructions
- Firstly, melt the dark chocolate in a microwave-safe bowl.
- Once melted, take the cone-shaped mold and carefully pour the chocolate in, spreading it evenly.
- Chill the mold in the refrigerator until the chocolate hardens.
- Meanwhile, melt the green candy melts and once the chocolate is set, pour this over the hardened chocolate layer.
- Decorate with mini marshmallows for snow and sprinkle edible glitter on top.
- Let everything cool, then carefully remove from the mold and enjoy your festive treat!
Notes
- For a fun twist, you can use other colored candy melts.
- These chocolate trees can be made ahead of time and stored.
Nutrition
- Serving Size: 1 tree
- Calories: 150
- Sugar: 12 grams
- Sodium: 10 grams
- Fat: 8 grams
- Saturated Fat: 5 grams
- Unsaturated Fat: 3 grams
- Trans Fat: 0 grams
- Carbohydrates: 15 grams
- Fiber: 1 gram
- Protein: 2 grams
- Cholesterol: 0 mg
Keywords: Christmas Chocolate Trees, festive dessert, holiday treat